

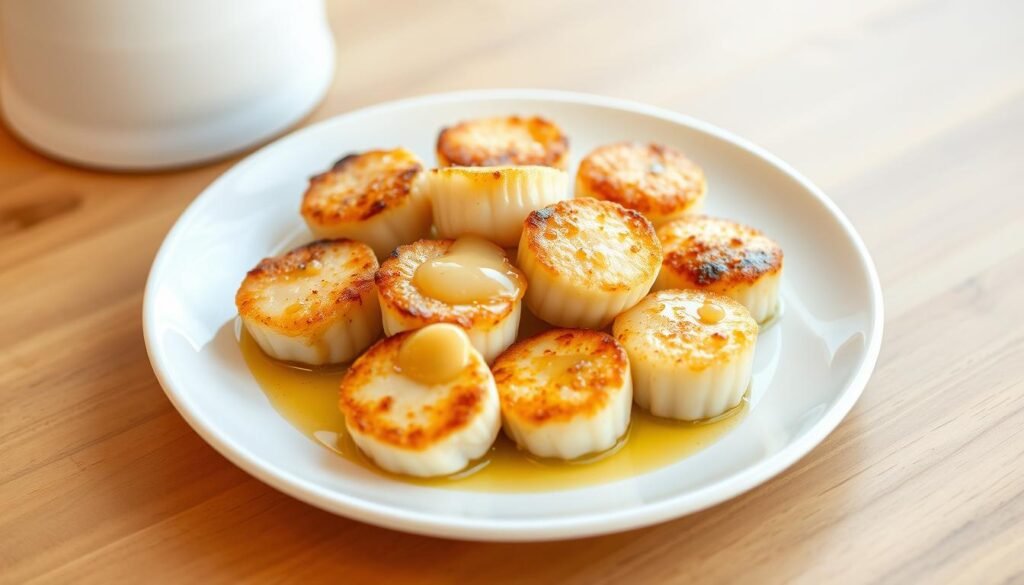
I love a simple weeknight dinner that still feels special. I’ll show you how to cook scallops in the oven with clear temps and few ingredients so you get tender, restaurant-style results at home.
I pick dry-packed scallops for a sweet, clean flavor and I always remove the side muscle. Pat each piece dry and season both sides. Classic notes—butter, lemon, garlic, and fresh herbs—lift the seafood without fuss.
For a crisp finish, I use a panko-Parmesan top and bake a bit hotter. My three reliable ways are 400°F for 10–12 minutes to an internal 125–130°F, 425°F with topping for a crunchy crust, or 350°F covered for 20–25 minutes then a short broil. These paths keep the inside tender, never rubbery.
I also set out quick sides that round the meal and note simple storage and gentle reheating tips so leftovers stay great.
Key Takeaways
- Dry-packed scallops give better flavor and texture.
- Pat dry and remove the side muscle for even bites.
- Target 125–130°F internal temp for tender results.
- Choose 400°F, 425°F with panko, or 350°F then broil.
- Classic flavors: butter, lemon, garlic, and herbs.
- Store chilled for 2–4 days; reheat gently to serve.
What You’ll Learn Now (Quick Answer for Busy Cooks)
I cut straight to the steps I use when time is tight and taste matters.
At-a-glance: Preheat oven, season with salt and pepper, then pick the timing that fits your night. For tender results I bake at 400°F for 10–12 minutes. For a golden topping I raise the heat to 425°F for 12–15 minutes. For a saucier, gentle finish I cover and bake at 350°F about 20–25 minutes, then broil 2–3 minutes.
Essential tools and the right baking dish
- Small rimmed dish: fits scallops in a single layer so butter and garlic baste.
- Instant-read thermometer: insert through the side and pull at 125–130°F internal temperature—this will make sure the center stays tender.
- Basic gear: measuring spoons, tongs, and a small bowl for the butter-lemon sauce.
Pat each piece dry before seasoning so salt and pepper stick and texture improves. Watch for opaque centers with a slight give as a final visual cue that your scallops are done.
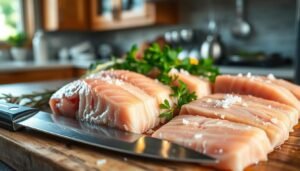
Choose the Right Scallops for Baking
Choosing the right scallop at the market makes a big difference in texture and timing. I look first at size and packing because those two things steer the whole recipe.
Sea scallops vs. bay scallops: size, flavor, and best uses
Sea scallops are larger (about 1½–2 inches) and stand up well to oven heat. Their size gives a meaty bite and a reliable texture that I prefer for baking.
Bay scallops are tiny, around ½ inch, sweeter, and cook fast. I use them in pastas, chowders, or mixed seafood dishes where quick cooking suits their delicate nature.
Dry-packed vs. wet scallops: why “dry” makes all the difference
Dry-packed scallops are not brined. They taste cleaner, brown better, and won’t shed liquid that ruins a sauce or prevents proper browning.
Wet scallops have been treated with a solution. They often shrink and weep water while cooking and can carry an off taste.
- I check freshness by feel: firm and slightly springy, smelling like clean ocean.
- Match size across the pan for even doneness; larger sea scallops give extra timing cushion.
- Always make sure the label says dry-packed or ask your fishmonger.
My Ingredients & Pantry Staples for Baked Scallops
I keep the list tight so each bite stays bright and balanced. These essentials form a reliable base for a simple sauce and an optional golden topping.
Butter, garlic, and lemon juice are the trio I reach for first. I use unsalted butter so I can control seasoning. Fresh garlic gives an aromatic backbone. A squeeze of lemon or a little lemon juice lifts every bite.
“A small splash of dry white wine in the bowl with melted butter adds depth without heaviness.”
Seasoning and herbs: I rotate between simple salt and pepper or Old Bay when I want a spiced edge. I finish with chopped parsley or chives for a fresh note.
- For a topping: panko mixed with finely grated parmesan and extra-virgin olive oil browns light and crisp.
- Measure once: I use a cup measure for even coverage and a small bowl for the butter-wine mix so assembly is fast.
- Keep it lean: I watch the amount of fat so the sauce complements, never overwhelms, the scallops.
Quick tip: lay out ingredients before you start. That little ritual speeds up prep and keeps flavors clean and consistent.
How to Cook Scallops in the Oven: Step-by-Step
Start by setting your oven to 400°F (raise to 425°F if you want a crisp panko-Parmesan top). I lightly butter or oil a small baking dish so nothing sticks and the sauce spreads evenly.
I pat dry each scallop with paper towels and remove the crescent-shaped side muscle—don’t skip this. Then I place the pieces in a single layer so each gets the same heat and basting.
In a small bowl I whisk melted butter, minced garlic, and lemon juice into a simple mixture. I spoon that over every scallop so flavor reaches each side. I season lightly with salt pepper or a touch of Old Bay.
Optional topping and baking
For a crunchy finish I mix panko, grated Parmesan, olive oil, and a pinch of red pepper flakes until the crumbs clump. I scatter a thin layer on top and bake 10–12 minutes at 400°F (12–15 minutes at 425°F).
If I want extra color I broil 2–3 minutes while watching closely. Before serving I spoon the buttery pan juices back over the dish so nothing flavorful stays behind.
Time, Temperature, and Size: Dialing In Perfect Doneness
Nailing doneness is mostly about matching time and temperature to scallop size. I follow clear paths so results are repeatable. Pick the one that fits your topping and texture goals, then watch the clock for the final minute.
400°F for 10–12 minutes
Buttery, tender finish: I bake at 400°F for 10–12 minutes and pull at 125–130°F internal temperature. That short span keeps centers soft and juicy without drying out.
425°F for 12–15 minutes
Golden panko-Parmesan crust: For a crunchy top I raise the temp to 425°F and bake 12–15 minutes. The crust browns faster while the interior stays slightly translucent.
350°F covered, then broil
For a saucier dish I cover and bake at 350°F about 20–25 minutes, then broil 2–3 minutes for color. Covering traps juices and prevents collapse.
- I add a minute or two for larger sea size and subtract for tiny bay pieces.
- Visual cues matter: opaque center and a slight give match the internal temp goal.
- Keep an eye during the last minutes—higher temps brown toppings fast.
How I Know When Scallops Are Done

I watch the center for a soft, opaque look and a tiny spring when I press gently. That tells me the interior is set but still tender.
Visual cues: opaque centers and a slight give
Look for cores that are no longer translucent. Press lightly; a gentle spring means a silky texture, not a firm chew.
Target temperature: aim for 125–130°F
I slide an instant-read thermometer in from the side and pull at about 125–130°F. This range keeps the bite soft and juicy.
Avoiding rubbery texture: common overcooking mistakes
- I trust the clock and the cues instead of chasing deep color.
- I spoon hot butter over the top right after the pan comes out to lock in moisture and shine.
- I finish with a quick pinch of salt and a crack of pepper, then plate before carryover heat pushes doneness higher.
- If I need to check, I cut the thickest scallop to confirm texture rather than reheat the whole batch.
- I keep any broiler step very short so crisping the top doesn’t dry the center.
In short: trust sight, touch, and a quick thermometer read. That trio keeps the scallops done and perfectly tender every time.
Flavor Variations and Simple Sauce Ideas
Bright citrus, a crunchy crumb, or a silky pan sauce—each choice highlights the seafood in its own way. I keep these options small and repeatable so weeknight meals feel special without extra fuss.
Lemon-garlic butter with fresh parsley or chives
Classic and bright: I melt butter, add minced garlic, and stir in fresh lemon juice. I whisk this mixture in a small bowl, then spoon it over the scallops before baking.
I finish with chopped parsley or chives for color and a final pinch of salt pepper right before serving.
Panko-Parmesan crust with olive oil and red pepper flakes
For crunch I mix panko, grated parmesan, and olive oil until crumbs clump. A pinch of red pepper flakes adds gentle heat.
I spread the panko mixture lightly so the topping browns golden at 425°F without smothering the seafood.
Buttery white wine pan sauce (optional)
When I want restaurant-style depth I splash dry white wine into the butter mixture and reduce briefly. I spoon that warm sauce over the scallop right before plating for a silky finish.
- I rotate between lemon-garlic butter and a crisp panko-Parmesan topping depending on mood.
- I tailor lemon intensity by adjusting juice so acidity supports, not dominates.
- Spoon pan juices back over the dish to glaze and amplify flavor.
Serving Ideas: What to Pair with Oven-Baked Scallops
For a balanced meal I match rich seafood with bright, crisp greens and a modest starch.
Great combinations: I like garlic mashed potatoes or a light risotto as the warm base. Grilled or roasted green beans add crunch. Caprese-style asparagus or potatoes au gratin lift the plate when I want something more elegant.
Plating and finishing touches
I often bring the baking dish straight to the table so hot pan juices flow over each portion. I place lemon wedges nearby and spoon a little melted butter over the scallops right before serving for gloss and extra flavor.
Sauce-friendly bases
Rice, risotto, or cauliflower mash work well to catch every drop of sauce. I portion rice or mash by the cup for tidy plating and balanced servings.
Simple pairing checklist
- I pair with garlic mashed potatoes or caprese asparagus for a cozy dinner.
- I lean on grilled green beans for freshness and textural contrast.
- I keep sides simple so the dish remains the star of the meal.
- I arrange scallops in a single layer for easy serving and to protect any crisp topping.
“Lemon and butter finish brightens each bite and ties the whole plate together.”
Storage, Reheating, and Make-Ahead Tips
When I plan ahead I separate sauce and crumb topping for better texture later. That small step makes a big difference for leftovers.

Fridge timing and freezing notes: I cool baked scallops quickly, dab any condensation with a paper towel, and store in a shallow airtight container. I label with days and aim to eat within 2–4 days for best texture. Freezing is possible for 2–3 months, but I prefer fresh or refrigerated for the most delicate bite.
Fridge timing, freezing notes, and gentle reheating
I reheat gently in a covered baking dish in the dish oven at low temp, or in a lidded skillet on the stove. I check internal temp and pull once it reads 125–140°F so the centers stay silky, not rubbery.
Keeping toppings crisp vs. saucy textures
Panko toppings lose crispness overnight. For crunchy results, I add crumbs just before baking or toast them quickly before serving.
- I store scallops cooked with sauce separately when possible to preserve texture.
- Dab lids or paper towels over the container if excess moisture forms.
- I sometimes stir in a teaspoon of melted butter or reserved pan fat when warming to restore juiciness.
- Finish with a light pinch of pepper after reheating to brighten flavors.
Conclusion
, Keep it simple: pick dry-packed sea scallops, pat them with paper towels, and trim the side muscle for even bites.
I trust three reliable paths: 400°F for 10–12 minutes, 425°F for 12–15 minutes with a panko-Parmesan crust, or 350°F covered for 20–25 minutes then a quick broil. Each choice protects a tender center.
Finish with the classic trio of butter, garlic, and lemon, season lightly with salt pepper, and spoon hot pan juice over each piece. Serve from the hot dish with lemon wedges.
Store leftovers 2–3 days and reheat gently so the fat and juice stay silky. Use these simple recipes and timing and you’ll make restaurant-quality baked scallops at home any night.


2 Responses