

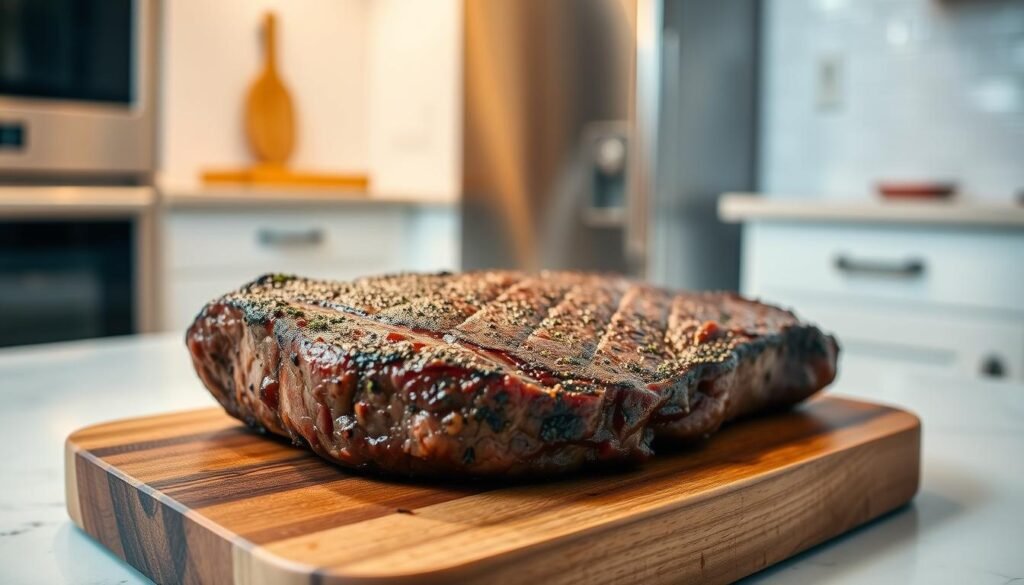
I make this method when I want a steakhouse crust at home with a juicy center. I sear a well-seasoned cut in a screaming-hot cast iron skillet for two minutes per side, render the fat edge briefly, then finish in a 500°F oven. This short oven finish hits the right temperature for medium-rare or medium without overcooking.
My approach uses simple seasoning—just salt and pepper—and a pat of butter for gloss at the end. If the pan is seasoned well, I skip oil; otherwise I reach for avocado oil or ghee. Thin ½-inch cuts may stay on the stovetop, but thicker pieces benefit from the oven finish.
I’ll walk you through timing, gear choices, and small tricks that protect juiciness. You’ll learn why starting temperature, skillet material, and thickness matter, and how a brief rest seals the results.
Key Takeaways
- Use a screaming-hot cast iron skillet for a deep crust.
- Sear 2 minutes per side, render the fat edge, then finish in a 500°F oven.
- Aim for ~135°F for medium-rare; rest 5 minutes before slicing.
- Simple seasoning highlights the beef; finish with butter for shine.
- Thinner cuts can be pan-fried only; never cook from frozen.
Why I Love the New York Strip (and What You’ll Learn Today)
I reach for a new york strip when I want bold beef flavor and a crisp crust in minutes. This boneless cut comes from the top loin and gives a juicy center with a satisfying chew.
It’s fast on the stove—often on the table in under 10 minutes—so it fits weeknight timeframes. As a protein, it needs little prep: salt, pepper, and a hot pan highlight its natural taste.
I’ll show the exact way I build that crust without overcooking. You’ll learn internal temps and simple steps for pan-searing, cast-iron plus oven finishes, and quick grills.
- I love the balance of flavor and texture in this york strip.
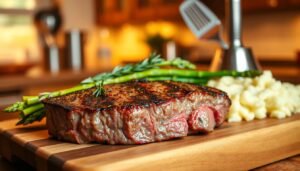
- Pairings are easy—clean sides like steamed veggies or a fried egg keep the meat front and center.
- By the end, you’ll have repeatable timing and a confident plan for any steak night.
Choose the Right Cut: Grades, Thickness, and Fat Cap Matter
Start at the meat counter with a clear idea: marbling, thickness, and that all-important fat edge guide the final result. I pick the grade based on the experience I want and how I’ll finish the steak.
USDA Prime, Choice, and American Wagyu
Choice is great value and eats well when seared hard. USDA Prime brings more marbling and richer juiciness.
American Wagyu—for example from Snake River Farms—uses the Japanese BMS scale and can exceed Prime. That higher BMS shows as buttery texture and deeper flavor, perfect when I want a luxurious bite.
Ideal Thickness for Sear + Oven
I aim for about a 1-inch cut for my cast-iron plus oven method. It gives a reliable crust and an even finish at the right internal temperature.
Very thin steaks (around ½ inch) skip the oven and get a quick pan sear so they don’t overshoot doneness.
Trim or Keep the Fat Cap?
I favor a decent fat cap that isn’t over-trimmed. Rendered edge fat bastes the meat and adds flavor as the crust builds.
I also watch for a thin connective tissue ribbon between meat and fat. If it’s minimal, I keep the piece—too much ribbon makes chewing less pleasant.
- I choose marbling based on value and indulgence: Choice, Prime, or American Wagyu.
- Pick even thickness for consistent cooking on a grill or in a skillet.
- Keep a modest fat cap for flavor and predictable cook times.
Gear and Heat: The Cast Iron Skillet, Oil, and Thermometer I Rely On
Good gear makes the difference between a thin brown film and a true restaurant-quality crust. I pick tools that build heat fast and hold it steady so each strip steak gets a fierce sear without steaming.

Best pans for a crust: cast iron, stainless, carbon steel
I reach for a cast iron pan first because it gets blazing hot and stays hot. An iron skillet locks in heat, which is the foundation for a steakhouse crust.
If my cast is busy, stainless or carbon steel are fine backups. They brown well, but I watch their heat recovery closely. I avoid nonstick—it won’t safely hit the temperatures needed for a proper sear.
Fats that stand up to high heat
When the pan isn’t well seasoned, I use a high-smoke-point oil like avocado oil or ghee. That keeps fat from burning before the crust forms.
Thermometer targets for consistent results
An instant-read thermometer is my safety net. For medium-rare I aim for the low 130s°F after resting, though I sometimes pull a bit earlier knowing carryover will finish the job.
- Preheat: 5–7 minutes until the pan smokes.
- Fat choices: avocado oil or ghee, or none if the pan is seasoned.
- Thermometer: quick checks during searing or on the grill keep doneness predictable.
how to cook new york strip steak: My Step‑by‑Step Cast Iron + Oven Method
I follow a clear routine so each strip gets a deep crust and a juicy center. It begins with oven and pan heat, then simple seasoning, a fierce sear, a short oven finish, and a loose rest with butter.
Preheat like a pro
Set the oven to 500°F. Warm a well-seasoned cast iron skillet over high heat for 5–7 minutes until it smokes.
Season simply
Pat the piece dry with paper towels. Sprinkle kosher salt and freshly ground black pepper on both sides so the crust forms quickly.
Sear hard, render edge
Place the strip in the hot skillet and don’t move it: sear 2 minutes per side. Tip the strip up and kiss the fat edge on the pan for about 30 seconds.
Finish in the oven
Slide the iron skillet into the oven and roast for 3–4 minutes for medium-rare (aim for the low 130s°F). For medium, add another minute or two.
Rest and finish
Rest minutes under loose foil for about 5 minutes so juices redistribute. Top with a small pat of butter for a glossy finish.
- Tip: Use a teaspoon of neutral oil only if the pan isn’t well-seasoned.
- Spices: If you add aromatics, shorten the sear to prevent charring and lean on oven time.
- Scale: For two pieces, use a large iron skillet and avoid crowding so each gets an even sear.
Fast Stovetop Pan-Sear: New York Strip in a Hot Skillet, No Oven
Skip the oven and let a hot skillet do the work. I bring the piece to room temperature for about 30 minutes so it sears evenly and cooks predictably.
Pat the surface dry and season with salt pepper. Heat a tablespoon of high‑smoke‑point oil in a large pan over high heat until it shimmers, then lay the strip steak down and don’t move it.
Timing and finish
I sear roughly 3 minutes per side in a big, hot pan. Check the center with an instant‑read thermometer; around 125°F before rest lands me at medium‑rare after carryover.
Optional butter baste
In the last minute I add a knob of butter, crushed garlic, and a thyme sprig. I tilt the pan and spoon the melted butter over the top for a glossy finish.
- Thicker cuts: lower the burner slightly after the initial sear or stand the steak on its fat edge to render.
- Two steaks: use a roomy skillet so each one breathes and develops a clean crust.
- Leftovers: reheat in a small pan with a bit of butter, or microwave ½‑inch strips for about 30 seconds for speed.
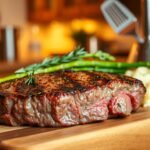
I rest the meat a few minutes, slice against the grain, and serve while the crust stays crisp and the center remains warm. This method gives big flavor in well under 15 minutes for a fast, high‑protein meal.
Other Foolproof Ways: Grilling, Reverse Sear, and Sous Vide
When I want predictable results, I pick one of three proven techniques for a perfect crust and even doneness.

Grill marks and high heat
Grilling gives smoke, crosshatch marks, and a quick finish. I preheat to medium, oil the grate or the meat lightly, and cook 2 minutes, rotate 45°, then 2 more minutes.
Flip and repeat on the second side for about 8 minutes total for medium-rare. Keep the lid down and finish with flake salt and a 5-minute rest.
Reverse sear for edge-to-edge doneness
I use the reverse sear when I want even pink from edge to edge. I roast at 275°F until the internal temperature hits about 120°F, checking after 30 minutes and up to 60 minutes.
Rest 10–15 minutes, then sear in hot oil for 60–90 seconds per side. That blast of heat creates a phenomenal crust without overshooting the center.
Sous vide precision
Sous vide removes guesswork. I bag the piece and cook 1–2 hours at my target temperature, then pat dry and sear 1–2 minutes per side.
With this method I serve right away so the crust stays crisp. Across methods I keep a thermometer handy; it’s the fastest way to repeat great results every time.
- Quick tip: A small knob of butter in the last minute adds sheen and richness.
- Why use them: Grill for smoke and marks, reverse sear for even pink, sous vide for timing flexibility.
- Tool I trust: Instant-read thermometer for final checks.
Doneness, Temperature, and Time: Nail Medium-Rare Every Time
Nailing doneness is part feel, part numbers — and I use both every time.
Target pull points matter. I remove rares near 110°F, medium rare at about 120°F, and medium around 130°F. A short rest usually adds ~5 degrees, so plan that into your timing.
What changes the minutes needed
Thickness drives cook time more than anything. Two-inch pieces need gentler finishes. Thin cuts take fewer minutes and use fast, direct heat.
Pan type and initial temp
Cast iron holds heat and browns faster. Stainless or carbon steel need a bit more attention. Cold-center pieces let me build a deeper crust before the inside climbs. If I want edge-to-edge pink, I bring the meat closer to room temperature or use a reverse sear.
My practical checklist
- I watch the thermometer, not the clock, for final pulls.
- I account for stove quirks and adjust a minute or two as needed.
- When unsure, I pull a degree or two early and rest for a perfect medium rare finish.
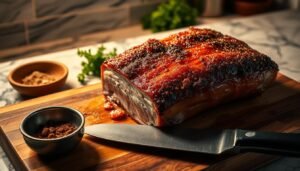
Seasoning, Crust, and Serving: My Simple Steakhouse Playbook
Seasoning and finishing choices are what turn a good cut into a restaurant-style serving at home. I keep things simple so the natural beef flavor and a crisp crust shine through.
Salt first. I either salt just before searing or use a quick dry brine for 30–60 minutes. Kosher salt gives me control; its grains spread evenly and help build that steakhouse crust.
I stick with salt pepper as my baseline and add butter at the end. For a twist, a small compound butter goes on after resting so it melts slowly over the meat.
When I baste with butter, I add it late with garlic and thyme so milk solids don’t burn during the sear. If I use a spice rub, I shorten the sear and finish a bit longer in the oven to avoid charring.
- I slice against the grain for maximum tenderness and add a pinch of finishing salt after carving.
- A teaspoon of neutral oil is enough when a pan needs help; often the rendered fat does the work.
- Serve fresh with simple sides: a lemony salad, roasted veggies, or a fried egg for a bistro vibe.
Leftovers, Storage, and Reheating Without Overcooking
Leftovers can taste just as good as the first night if you treat them with a little care.
Refrigeration and freezing: I store cooled pieces in an airtight container and refrigerate for 3–4 days. For longer life, I wrap tightly, place in a labeled freezer bag, and freeze up to 3 months.
When I freeze, I note the date so I track time. Thawing happens overnight in the fridge for the best texture. I don’t leave cooked meat at room temperature for long; chill promptly for food safety.
Gentle reheats that keep juices
I reheat sliced pieces in a small skillet over low heat with a dab of butter. A touch of oil helps if the pan is dry and prevents sticking.
If I’m pressed for minutes, I cut the meat into ½‑inch strips and microwave in 30‑second bursts until warm. That short method keeps the center from turning gray.
Cold uses I swear by
I love cold leftovers on a crisp salad or tucked into a lettuce‑wrapped sandwich for a fast lunch. I trim any excess solid fat after chilling so each bite stays clean and pleasant.
- I store leftover steaks for 3–4 days; freeze and label for up to 3 months.
- Thaw overnight in the fridge rather than at room temperature for better texture.
- When reheating, choose a skillet with butter or quick microwave ½‑inch strips for best results.
Conclusion
Trusting heat, timing, and a good iron pan makes consistent results the easy part of dinner night. Pick your method—my cast iron plus oven routine, a quick grill session, reverse sear, or sous vide—and set a clear target temperature and time minutes for your pull.
Keep the basics: dry the surface, season with salt pepper, and give the meat a fierce sear in a hot skillet or on the grill. Watch degrees with an instant-read thermometer and honor a short rest minutes window before slicing.
Whether you favor a new york strip or compare it to a ribeye, this recipe and these principles work. With steady heat and a trusted cast iron skillet or iron skillet, you’ll repeat great results and enjoy the rich beef flavor every time.


One Response