

I write this as someone who has tested every method until I found consistent results. London broil is a cooking method for lean, tougher cuts that rewards the right temperature control and a quick sear.
I outline three proven paths: a reverse-sear oven approach for edge-to-edge pink, a high-heat broil and pan-sear route for a steakhouse crust, and a low-and-slow braise when you want fork-tender beef.
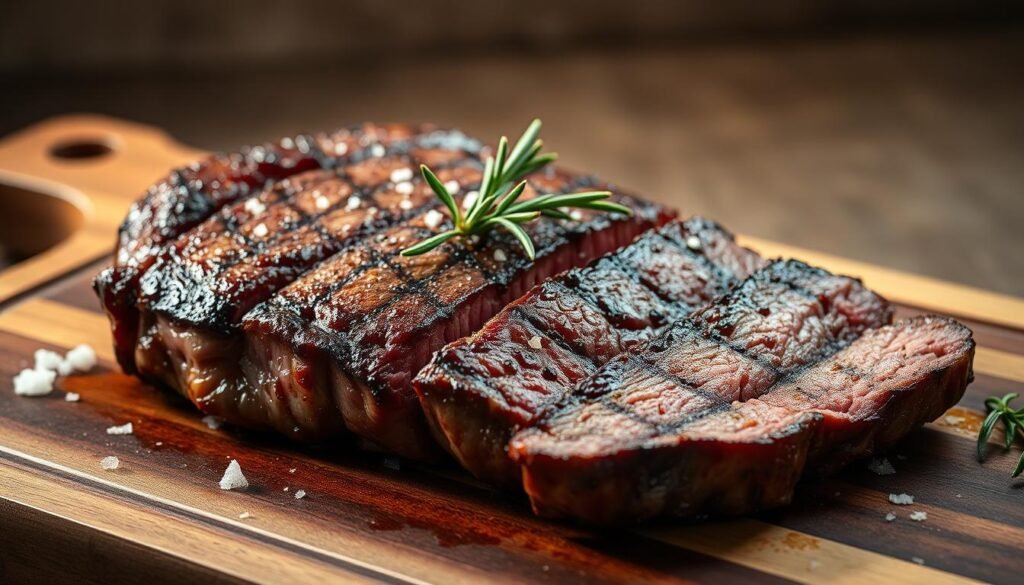
I never skip an instant-read thermometer. Pull the meat at about 127°F–135°F for medium-rare, rest 10 minutes, then sear in very hot neutral oil for a crisp exterior. A classic marinade—balsamic or lemon, soy or tamari, Worcestershire, garlic, and a touch of brown sugar—adds flavor without ruining texture.
Use flank, top round, or top sirloin. Rest and slice thin across the grain. I’ll walk you through rack positions, sear times, and equipment like a heavy skillet and a rack-lined baking sheet so you hit the mark every time.
Key Takeaways
- “London broil” is a method, not a single cut.
- Three reliable paths: reverse sear, high-heat broil/sear, and low-and-slow braise.
- An instant-read thermometer ensures the 127°F–135°F pull point for medium-rare.
- Classic marinade boosts flavor; avoid marinating beyond 8–12 hours.
- Use flank, top round, or top sirloin and slice against the grain after resting.
- Equipment: baking sheet with rack, heavy skillet, thermometer, and high smoke-point oil.
What I Mean by “London Broil” Today
London broil is a technique more than a single steak. Traditionally it meant a marinated flank steak sliced very thin against the grain. Now grocery labels may call many cuts a london broil, which can be confusing when you want a specific result.
Method vs. cut: flank, top round, and top sirloin explained
Flank steak is lean and flavorful but can be tough. Top round and other round steaks are even leaner and benefit from a marinade or a low-and-slow braise. Top sirloin is slightly more tender and shines when I use a reverse-sear for a thick piece.
Why medium-rare and slicing against the grain matter
For these lean cuts, about 130°–135°F keeps the meat juicy. Overcooking tightens fibers and makes chewing work. Always rest the steak briefly, then slice thin across the grain.
- Pick the right cut: read labels—flank, top round, or sirloin are common.
- Choose the method: quick high heat for pink centers, long braise for pull-apart beef.
- Finish smart: thin slices across the grain turn firmness into tenderness.
Quick Snapshot: My London Broil Recipe at a Glance
Quick reference: here’s the exact routine I use when I want a reliable steak with a tender center and a crisp crust.
I start with a 1½–2 inch piece, ideally top sirloin or a cut labeled for this method. I may marinate 2–6 hours in a balanced balsamic-soy/tamari-Worcestershire-garlic mix, but I often skip long soaking to keep texture firm.
Reverse sear: bake at 275°F until the thermometer reads about 127°–135°F, rest 10 minutes, then sear 2–3 minutes per side in very hot oil.
- Pan-sear + oven: sear 2 minutes per side, finish at 425°F for 5–6 minutes.
- Under the broiler: rack 6–7 inches; ~5–6 minutes first side, ~4 minutes after flipping.
- Season simply with kosher salt and black pepper; slice thin against the grain after resting.
“Most of the time is hands-off; active stovetop minutes are short.”
My Go-To London Broil Marinade (Balsamic, Soy Sauce, Worcestershire)
A good marinade balances bright acid, savory depth, and a touch of sweetness without masking the beef. I prefer a mix that seasons and gently tenderizes lean cuts while leaving texture intact.
Balanced flavors: acid, umami, a touch of sugar, and garlic
I whisk balsamic vinegar with soy sauce or tamari and a splash of Worcestershire sauce. Then I add crushed garlic and a modest spoon of brown sugar for balance.
How long without turning mushy
I keep the acid moderate and add a little olive oil or beef broth to help the mix coat the meat. My rule is 2–6 hours in the fridge for real flavor. Past 8–12 hours the acid can break down fibers and make the steak mushy.
Low-sodium swaps and gluten-free options
- Use low-sodium soy or tamari and low-sodium broth to cut salt.
- For gluten-free needs, swap tamari and a certified gluten-free Worcestershire.
- Pat the steak dry before searing and scrape off big garlic pieces so they don’t burn.
“Keep sweetness low; too much sugar burns on high heat and hides the beef’s flavor.”
Choose the Right Cut of Beef for Best Results
The cut you choose determines the method and the final texture. I start shopping with a clear plan: quick high heat, reverse sear, or long braise. That decision guides the meat I pick and the prep it needs.

Flank, top round, and top sirloin—what they do best
Flank steak was the original london broil cut. It rewards fast, hot treatment and thin slicing across the grain for classic results.
Top round and other round steak cuts are lean and can be tougher. I reach for top round when I plan a marinade or a braise that adds moisture and softens connective tissue.
Top sirloin shines when it’s thick-cut (about 1½–2 inches). That size suits my reverse-sear routine: steady oven time for even temp, then a hot pan for a bold crust.
Thickness, labels, and simple rules I follow
- I look for thick-cut steaks (1½–2 inches) for forgiving, even cooking.
- Read labels: “london broil” at the counter can mean top round, bottom round, or top sirloin.
- Plan the method to the cut—reverse sear or broil for pink centers, braise for shreddable tenderness.
“Always rest the meat, then slice thin against the grain—small cuts make each bite feel tender.”
Equipment I Actually Use
My gear list is short, but each piece earns its place every time I sear a steak. I rely on tools that cut guessing and make results repeatable.
Must-haves:
- Instant-read thermometer for precise pull temps and no guesswork.
- Baking sheet with a rack and a sheet of aluminum foil for airflow and fast cleanup.
- Heavy skillet (cast iron preferred) that holds heat for a proper sear with hot oil.
- Sturdy tongs, a cutting board, and a sharp chef’s knife for thin slicing across the grain.
- Coarse kosher salt and freshly cracked black pepper for simple, reliable seasoning.
I always preheat the oven and check rack placement when I plan to broil. That step keeps browning even and predictable.
For finishing, I might add a small knob of butter or a splash of olive oil at the end of the sear. Heat the pan until it’s shimmering so the crust forms fast without overcooking.
“Few tools, big impact — precision gear makes great steak repeatable.”
Reverse Sear Method in the Oven (My Favorite Way)
My favorite trick for a consistent steak is slow, gentle oven heat before a fierce sear. It gives even color from edge to edge and makes the final pan work quick and precise.
Preheat oven to 275°F and season simply
I preheat the oven to 275°F and position a rack over a foil-lined sheet for airflow and easy cleanup. I pat the steak dry, season with kosher salt and black pepper, and remove any large garlic bits if the meat was in a marinade.
Target temperatures with a meat thermometer
I bake low and slow, checking temperature after 30 minutes. Thicker cuts may need 45 minutes or more. I pull at about 127°–135° for medium-rare depending on my preference.
“Pull the steak at the right internal temperature and resting does the rest.”
Hot skillet finish: neutral oil, high heat, quick sear
I heat a heavy skillet until the oil glimmers, then sear 2–3 minutes per side. I press gently so the crust makes full contact. The center hardly rises because the oven reached the target temperature first.
- I rest the steak about 10 minutes so juices settle.
- I slice thin across the grain immediately after final sear or after a brief tent.
- I finish with a sprinkle of flaky salt to boost the crust and juices.
Classic High-Heat Options: Broiler, Grill, and Pan-Sear + Oven
When I want fast, bold browning I reach for high-heat tools that lock in flavor. These methods are direct, quick, and great for lean steaks that benefit from a crisp exterior and a juicy center.
Broiler technique and timing
I set the rack 6–7 inches from the heat so the surface browns without burning. I broil about 5–6 minutes on the first side, flip, then roughly 4 more minutes and check internal temperature.
Pan-sear then oven finish
I love a skillet-first approach: sear 2 minutes per side in a screaming-hot pan with a high-smoke-point oil, then finish in a 425°F oven for 5–6 minutes for a restaurant-style crust.
- Rest under foil for 5–10 minutes before slicing.
- Slice thin across the grain for tenderness.
- Marinate top round; keep top sirloin simple for the best sear.
- Rotate the pan under the broiler if your oven has hot spots.
“Quick, intense heat demands close attention—these minutes define the result.”
Low-and-Slow London Broil Variations
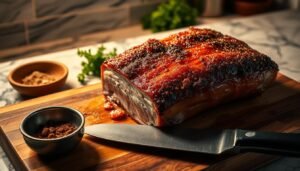
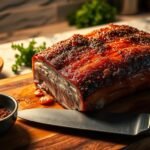
When I want shreddable tenderness, I slow-roast a lean cut until the meat yields under a fork. This route trades a pink center for a generous sauce and deep flavor. I pick top round or a cut labeled “london broil” for braising.

Oven braise at 250°F for fork-tender results
I preheat the oven to 250°F, then sear the meat briefly in a mix of butter and neutral oil until browned. I add sliced onions and a sauce made from red wine vinegar, ketchup, brown sugar, garlic, Worcestershire, and beef broth.
I cover the Dutch oven and braise about 2½ hours. If the roast needs more time, I add 30 minutes and test for fork-tender doneness. When ready, I skim juices and thicken with a cornstarch slurry for a glossy gravy.
Slow cooker and Instant Pot directions
For a set-it-and-forget-it option, I move the seared meat and sauce into a slow cooker for 7–8 hours on low or 3–4 hours on high.
For speed, I use an Instant Pot: after searing, I pressure cook on high/manual about 1½ hours, then allow a natural release of ~15 minutes. The result shreds easily and soaks up sauce.
“I serve this roast over mashed potatoes, rice, or buttered noodles so every forkful catches the sauce.”
- Serve: mash, rice, or noodles to capture sauce.
- Adjust: taste the sauce after braising; add salt or a splash of vinegar for balance.
- Store: refrigerate leftovers in an airtight container for 2–3 days; reheat gently with added broth.
Exactly How to Cook London Broil
I keep the final steps simple and precise. Plan the sequence: optional marinade, a dry surface, gentle oven or direct high heat, then a fast sear. This short plan helps me hit the right temperature every time.
Step-by-step: from marinade to rest to sear
I mix the marinade (balsamic, soy/tamari, Worcestershire, garlic, brown sugar) and chill the steak for 2–6 hours when I use one.
I remove the meat, pat it dry, and season evenly with kosher salt and cracked pepper. Dry equals better browning.
For a reverse sear I bake at 275°F on a rack for 30–45 minutes until the internal temperature hits about 127°–135°F. Rest roughly 10 minutes, then sear 2–3 minutes per side in hot neutral oil.
Resting time and cutting against the grain on the cutting board
I move the steak to a cutting board, rest, and slice thin across the grain. Thin slices make this london broil feel tender in every bite.
I sometimes finish with flaky salt or a knob of butter and serve immediately. This method keeps results repeatable and flavorful.
“Pat dry, hit target temp, rest, then slice thin—simple rules, great results.”
Time, Temperature, and Doneness Guide
Timing and precise temperature make the difference between a chewy dinner and a tender steak. I rely on clear numbers and a quick thermometer check rather than guesswork.
- Rare: 120–125°F
- Medium-rare: 130–135°F
- Medium: 140–145°F
- Medium-well: 150–155°F
- Well-done: 160°F and above
Carryover cooking and pull timing
I pull the steak a few degrees shy of my goal. Carryover will nudge internal temp up while the meat rests.
For reverse-sear in the oven, I start checking around 30 minutes; thick pieces often reach target closer to 45 minutes. Under the broil, a useful guide is roughly 5–6 minutes on the first side, then about 4 minutes after flipping for medium-rare, but I always confirm by temperature.
Practical rules I follow
- I use an instant-read thermometer rather than time alone because thickness and oven calibration vary.
- Searing adds minimal internal heat for thick cuts, so check before slicing.
- Rest briefly (5–10 minutes) after high-heat finishes to preserve juices.
- Slice thin across the grain so even slightly overdone beef feels tender.
- Remember: lean cuts dry out at well-done; medium-rare is the juiciest route for london broil-style steaks.
“Pull a touch early, rest well, and verify with a thermometer — those small steps make big differences.”
Serving Ideas, Sides, and Finishing Touches
A few smart sides and a glossy pan sauce lift this steak into dinner-party territory. I keep plates balanced so the meat stays the star, while sides soak up juices and add contrast.
Steakhouse sides: mashed potatoes, roasted veggies, grains
- I pair slices with creamy mashed potatoes and roasted broccoli or honey-roasted carrots for a classic feel.
- Garlicky spinach brightens the plate, while farro, rice, or buttered egg noodles catch every drop of juice.
- Serve family-style: slice and fan the steak across the platter so the juices can be spooned over each side.
Finishing salts, butter, and pan sauce options
Finish strong: a pat of butter and a sprinkle of flaky salt bring rich flavor and shine. Keep freshly cracked pepper at the table so guests can adjust their bite.
I build a quick pan sauce by deglazing with beef broth or a splash of balsamic, then whisking in a bit of butter for gloss. For braised variations, I thicken cooking juices with a cornstarch or flour slurry and taste for balance.
- Add a spoon of mustard or a dash of Worcestershire for deeper savory notes.
- A squeeze of lemon or chopped herbs brightens heavy flavors, and a light drizzle of good olive oil adds silk before serving.
“A simple sauce and smart sides make this dish feel like a restaurant at home.”
I serve this as a shareable dish for weeknights or casual dinner parties. It’s steady, comforting, and built around a single, flavorful steak—perfect for any meal where the table gathers.
Conclusion
My final tip is simple: match the method to your cut, trust the thermometer, and slice with care.
I recap the three reliable ways that make a great london broil recipe: reverse sear for precise medium-rare; high heat (broiler or pan-sear plus oven) for fast crust; and low-and-slow braise for pull-apart tenderness.
Keep marinating to 2–6 hours, watch the time and temperature guide, and always cut thin across the grain. Simple seasoning lets the beefy flavor shine; add a quick pan sauce when you want extra richness.
After a few repeats this recipe becomes a weeknight-friendly staple. Serve with favorite sides and enjoy a steakhouse-style plate at home.


One Response