
I set expectations up front: thawing in the refrigerator takes about three days at roughly five hours per pound, with the bird resting on a pan to catch any leaks.
I plan my roast with an initial high-heat blast at 400°F for twenty minutes, then lower the oven to 325°F and aim for roughly thirteen minutes per pound. I always start checking temperature at least an hour before my clock estimate.
Temperature checks matter: I pull the breast when it reads 155–160°F and the thigh at 160–165°F. Carryover heat will bring the meat to the USDA target of 165°F without drying it out.
For a juicier breast, I sometimes roast breast-side-down and flip near the end to brown under 500°F or the broiler for four to five minutes. Salt the skin, tuck aromatics in the cavity, and plan fridge space plus a tray under the pan while thawing.
Key Takeaways
- Refrigerator thawing = about three days; use a tray under the bird.
- Start with 400°F for 20 minutes, then roast at 325°F ~13 minutes per pound.
- Pull at 155–165°F depending on cut; rely on a thermometer, not the clock.
- Breast-side-down yields juicier white meat; flip and brown for color.
- Cold-water thaw is a safe quick backup—change water every 30 minutes.
Quick answer: time and temperature for a juicy 15 lb turkey
My rule of thumb is simple: choose a faster roast at 350°F or a gentler finish at 325°F. For an unstuffed bird I plan about 3½–3¾ hours at 350°F, or roughly 4–4¼ hours at 325°F.
I always verify doneness with a reliable thermometer. Pull the bird when the breast reads 155–160°F and the thigh 160–165°F. Carryover heat will bring both above 165°F for safe, tender meat.
325°F vs 350°F: how many hours for an unstuffed 15 lb bird
- 350°F: ~3½–3¾ hours — faster browning, a bit less time in the oven.
- 325°F: ~4–4¼ hours — gentler roasting, more forgiving for juicy breast meat.
- Optional start: 400°F for 20 minutes to boost skin color, then drop to 325°F.
Target internal temperatures for safe, tender meat
Breast: remove at 155–160°F. Thigh: remove at 160–165°F. Let rest so carryover finishes the job.
Plan ahead: thawing and timing so the turkey is ready on time
To avoid last-minute stress, I lock in thawing days on my calendar well before roast day. This makes the whole week feel calm and keeps my schedule realistic.
Refrigerator thaw timeline
I count on about 75 hours — roughly three days — for a 15-pound bird when I budget 5 hours per pound. I keep the frozen turkey on a pan in the refrigerator so juices stay contained and the meat stays safe.
Cold-water thaw as a backup
If the bird isn’t thawed the day I planned, I switch to a cold-water method. I keep the turkey wrapped, submerge it in cool water, and change the water every 30 minutes until the cavity is pliable and ice is gone.
- I circle the date three days ahead and confirm the bird’s weight so my timeline fits the pound turkey number.
- On roast day I let the turkey sit at room temperature for 2–5 hours so oven time is more predictable.
- I always check the cavity first and remove giblets and the neck before seasoning and trussing.
My prep routine: pan, rack, aromatics, butter, and seasoning
Prep sets the tone. I stage everything before the oven heats so the roast goes smoothly. A clean station saves time and keeps the recipe stress-free.
I use a sturdy roasting pan with a fitted rack. That lets hot air circulate and keeps drippings in the pan for gravy. I set the oven shelf so the bird sits in the center of heat.

Roasting setup for even heat and drippings
I pat the skin dry and season with salt and pepper. I tuck aromatics — onion, lemon, carrot, and herbs like rosemary and thyme — lightly into the cavity. Don’t pack it; too many veggies slow the roast.
Butter under the skin, herbs, and cavity aromatics
I slide softened butter under the breast skin and spread a bit on the thighs. The butter locks in moisture and boosts browning. I truss the legs and tuck the wings so the bird roasts evenly.
- I remove the giblets and neck and save them for stock or gravy.
- I keep aromatics modest so the oven roasts the meat, not steams it.
- A simple salt-and-herb base is the best way to add classic flavor.
how long to cook a 15 lb turkey
I pencil in two reliable windows for an unstuffed 15-pound bird, then I set a timer so temperature checks start early.
At 325°F: typical window and when to start checking
Plan about 4–4¼ hours at 325°F for an unstuffed bird. I preheat oven and aim to begin checking the internal temperature roughly one hour before the low end of that window.
I probe the breast and thigh and then check every 15–20 minutes. That prevents overshoot and saves the meat from drying.
At 350°F: faster roast times and browning considerations
At 350°F I budget about 3½–3¾ hours. The higher temperature speeds color development, so I watch skin and juices closely.
If browning races ahead, I tent with foil or drop back to 325°F. An initial 400°F for 20 minutes is an option for extra color before reducing heat.
Room-temperature start vs cold bird: why it changes the clock
Bringing the bird nearer room temp shortens overall oven time and gives more even roasting. A cold bird straight from the fridge can add unpredictable minutes.
I always trust a thermometer over the clock: pull the breast at 155–160°F and the thigh at 160–165°F, knowing carryover will finish it.
- I keep the roasting pan and rack setup consistent — pan depth and rack height affect browning.
- I record my actual hours each year so my oven’s personality guides future timing.
Stuffed vs unstuffed: how stuffing changes cooking time
Stuffing the cavity adds measurable minutes to oven time and changes how I watch the roast. A stuffed 15–17 pound turkey usually needs more heat and attention than an unstuffed bird. I plan with that in mind so the meat and the filling finish safely.
Typical windows I use: At 325°F I allow roughly 4½–5 hours. At 350°F I expect about 3¾–4½ hours. Those hours are a guide; I begin temperature checks early and often.
Safety first: the center of the stuffing must reach an internal temperature of 165°F. I probe the middle of the filling with a reliable thermometer, not just the meat, before I call it done.
- I add time when I stuff the cavity because stuffing slows heat flow and can extend cooking turkey times.
- Many pros bake stuffing separately — this keeps the skin crisper, helps control salt and moisture, and makes pan drippings easier to manage.
- I lightly season the cavity with salt and herbs so the stuffing tastes balanced, and I place the bird on a rack so the pan still gets airflow.
- I avoid overpacking the cavity; loosely filled stuffing reaches 165°F faster and cooks more evenly.
“If the breast reaches 155–160°F while the stuffing lags, I continue roasting until both are safe.”
Thermometer strategy: exactly where and when I temp the turkey
My thermometer routine is simple: monitor early and often so minutes at the end don’t surprise me. I set probes before the oven hits high heat and keep tracking through the last hour.
Breast, thigh, and stuffing probe placement
I insert the probe into the thickest, coldest part of the breast, and the deepest flesh of the thigh, taking care to avoid bone so the reading reflects true meat temperature.
If the cavity is stuffed, I check the center of the filling as well; it must reach at least 165°F for safety.
Pull temps vs final temps
I plan to remove the bird when the breast reads 155–160°F and the thigh 160–165°F. Carryover will bring both to the USDA target of 165°F while preserving juices.
- I start spot-checking about an hour before my earliest finish estimate, then every 10–20 minutes.
- Remote probes let me monitor without opening the oven; I confirm with an instant-read near the end.
- I avoid touching the pan or rack with the probe tip to prevent false highs.
“I use the thermometer the entire cook—not just at the end—to anticipate if I need to adjust heat or tent with foil.”
Oven strategy: preheat, tenting with foil, and optional breast-side-down
I set the oven hot at the start so the skin gets an early lift, then ease back to a gentler heat for even roasting. Preheat oven fully before the bird goes in so the initial blast is consistent and reliable.
Why I sometimes start hotter, then reduce the heat
I often begin at 400°F for about 20 minutes to jumpstart browning and crisp the skin. After that I drop the temperature to 325°F for a gentle finish that helps the breast stay juicy.
Foil tenting to protect moisture and when to remove it
I use a loose aluminum foil tent during the first half when I want to protect moisture. Foil prevents overbrowning while the inside slowly gains temperature.
Remove the tent in the final stretch so the skin can brown. I watch the internal temperature and uncover once fat has rendered and the surface looks ready to color.
Breast-side-down roasting for extra-succulent white meat
The breast-side-down way naturally bastes the breast as juices flow downward. I place the bird on a rack in the pan so air circulates and the underside won’t steam in drippings.
If I need color on the breast I flip near the end and give it a quick high-heat finish for about 4–5 minutes. That short blast crisps the surface without overcooking the meat.
- Rack placement: keep the bird centered so heat hits evenly.
- Pan choice: low-sided pans promote airflow and cut extra minutes spent browning.
- Avoid over-basting: opening the oven too often drops temperature and costs time.
“Start hot for color, slow down for tenderness, and pick the method that fits your schedule and desired result.”
Alternate methods that affect time: oven bags and convection
When I swap to a bag or turn on convection, the roast finishes sooner and I tighten my temperature routine. These approaches change cooking time and the texture of the skin, so I plan differently than for an open-pan roast.
Oven bag roasting: expect an earlier finish—check temps sooner
Oven bags can shave roughly 30 minutes for a mid-sized turkey, so I begin checking internal temperature well ahead of the usual schedule.
I avoid stuffing when I use a bag because filling alters heat flow and safety. I follow the bag manufacturer’s slits and vent guidelines so steam escapes and the pan doesn’t flood.
- I still probe the breast and thigh; target pull temps remain the same for safe meat and reliable carryover.
- Bagged roasts often lack crisp skin, so I weigh that tradeoff if a golden surface matters to me.
- If the bird was recently thawed from the refrigerator or a frozen turkey was used, I make sure it is dry and even in temperature before bagging.
- I use a low-sided pan and a rack when not bagging so airflow helps even roasting and drippings collect cleanly.
- Track minutes from oven close, limit openings, and start temp checks earlier — convection and bags speed things up more than you expect.
“These alternate ways save time, but temperature checks still decide when the roast is truly done.”
Troubleshooting timing: early finish, running late, and uneven doneness
When timing goes off-plan, a quick routine keeps dinner calm and juicy. I focus on safe holds and small fixes that protect texture and flavor.

If it’s done too early: holding hot without drying out
I remove turkey from the oven and tent it with foil to trap heat and let carryover finish the temperature rise. A lower oven set near 225°F will hold warmth if guests are delayed.
If it’s running behind: safe ways to speed the finish
To catch up, I raise the oven back to 325–350°F or carve off finished dark pieces and return the breast to the heat. I watch the pan juices and add a splash of water only to prevent scorching.
Thighs done before breast or vice versa: what I adjust
If thighs are ready first, I flip the bird breast-up so white meat finishes faster. If the breast hits target early, I tent it and let dark meat continue roasting, checking with a trusty thermometer.
- Best way: tent finished areas with foil or a small aluminum shield to balance color.
- I document what worked so the next turkey cooking under pressure feels familiar.
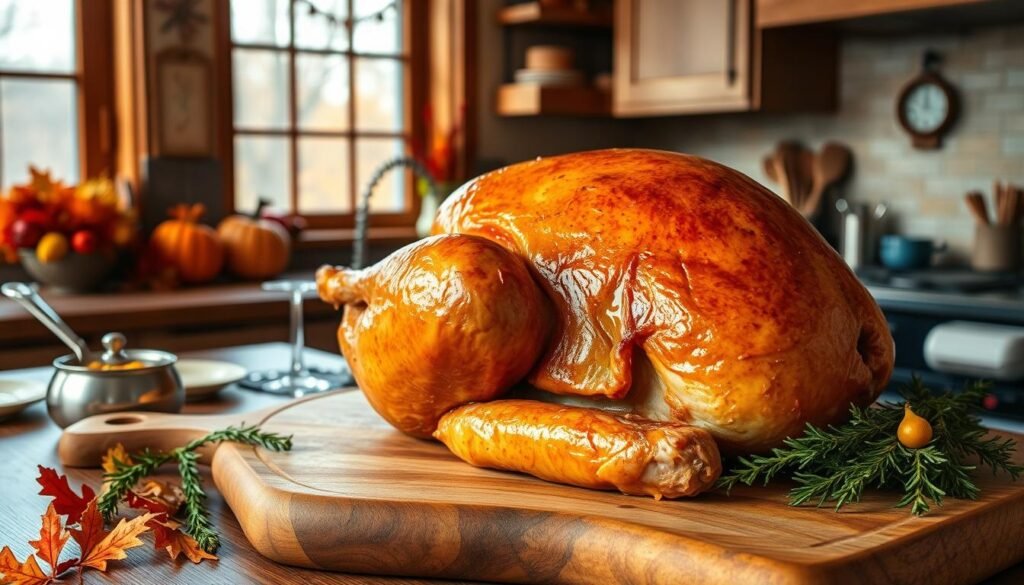
Resting, carving, and serving: crisp skin, clear juices, and great gravy
After roasting, I give the turkey a brief, protective rest so the juices settle and carving stays tidy.
I rest the bird 15–30 minutes, tented loosely with aluminum foil. I transfer it to a cutting board or rack set over a pan so drips collect and the skin does not steam.
Why rest matters and simple carving order
I carve legs and thighs first, then slice the breast last and against the grain so each piece keeps its juices and the skin stays attached. I check the cavity and confirm any stuffing reads 165°F before serving, and I discard aromatics from the cavity.
Pan gravy and saving extras
I make gravy in the pan: skim excess fat, whisk flour into the drippings to form a roux, then add stock or water and season. I save giblets and neck for stock if I want deeper flavor.
- Hold time: let turkey rest until stable to handle; those extra minutes improve texture.
- Storage: leftover meat keeps 3–4 days in the fridge or freezes up to 3 months; chill in shallow containers.
- Serving tip: remove turkey portions methodically so the board stays tidy and crisp skin survives service.
“A short rest and careful carve make the difference between dry slices and memorable meat.”
Conclusion
, I set a clear timeline that ties refrigerator thaw days with oven minutes and resting time. For thanksgiving planning, expect about three days in the refrigerator and roughly 3½–3¾ hours at 350°F or 4–4¼ hours at 325°F for an unstuffed turkey.
I rely on a thermometer: pull breast at 155–160°F and thigh at 160–165°F so carryover brings both to 165°F. I use butter under the skin and simple aromatics for flavor and crisp skin.
The best way is the one that fits your schedule. Rest 15–30 minutes, carve, and save leftover portions for easy meals in the days after thanksgiving. A planned bird means I enjoy the day, not just the recipe.