
I wrote this recipe to show exactly how I get juicy, perfectly baked seafood without guesswork. I use a simple sheet-pan method and clear roast times so the protein stays tender and full of flavor.
Tested temps matter: I note a 450°F roast for 7–9 minutes for sweet, soft results with caramelized garlic. Many trusted recipes, including Ina Garten’s, use 400°F for 8–10 minutes for consistent doneness.
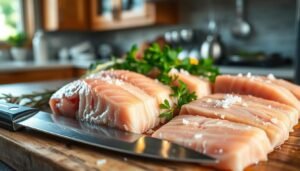
I also explain count numbers like 16/20 or U/10 so you can pick the right pound size and understand how size affects cook time and texture. A quick defrost under cold running water for 15–20 minutes gets a frozen bag ready without harming texture.
My method leans on minimal ingredients, pantry staples, and a dependable timing window so you can scale this dish for weeknights or parties with confidence.
Key Takeaways
- Roast at steady temps for tender results; 450°F for 7–9 minutes gives caramelized flavor.
- 400°F for 8–10 minutes is a reliable, gentle option many recipes use.
- Understanding count numbers (16/20, U/10) helps match size and time per pound.
- Quick defrost: cold running water for 15–20 minutes keeps texture firm.
- Minimal ingredients and a sheet-pan method deliver consistent, scalable results.
Why I Love Oven-Baked Shrimp for Quick, Juicy Dinners
I pick the oven when I want a fast, reliable dinner that locks in moisture and builds even flavor. A steady roast means I can get a high-protein meal on the table in minutes without hovering over a pan.
Roasting at 400°F for 8–10 minutes is my baseline; many trusted recipes recommend the same window. This timing gives a sweet finish while garlic softens and lemon brightens the tray.
I prefer larger counts like 16/20 or 21/25 because big pieces hold juice and resist overcooking. Smaller numbers per pound mean bigger pieces, so texture stays tender and satisfying.
- Speed: ready in minutes, great midweek.
- Simplicity: toss in a bowl with oil, pepper, and garlic, then spread on a sheet pan.
- Consistency: predictable timing helps me time pasta, salads, or a quick sauce.
“A hot oven roasts gently and gives a sweeter, more even flavor than fast pan searing.”
Ingredients and Tools You’ll Need
I keep the prep simple so the finished plate tastes clean and bright. A short list of ingredients and a few tools make this an easy, repeatable recipe for weeknights or guests.

Simple ingredients
I use quality shrimp and a drizzle of olive oil for a silky finish. Fresh garlic, a squeeze of lemon, kosher salt, and black pepper lift the flavors without fuss.
Sheet pan essentials
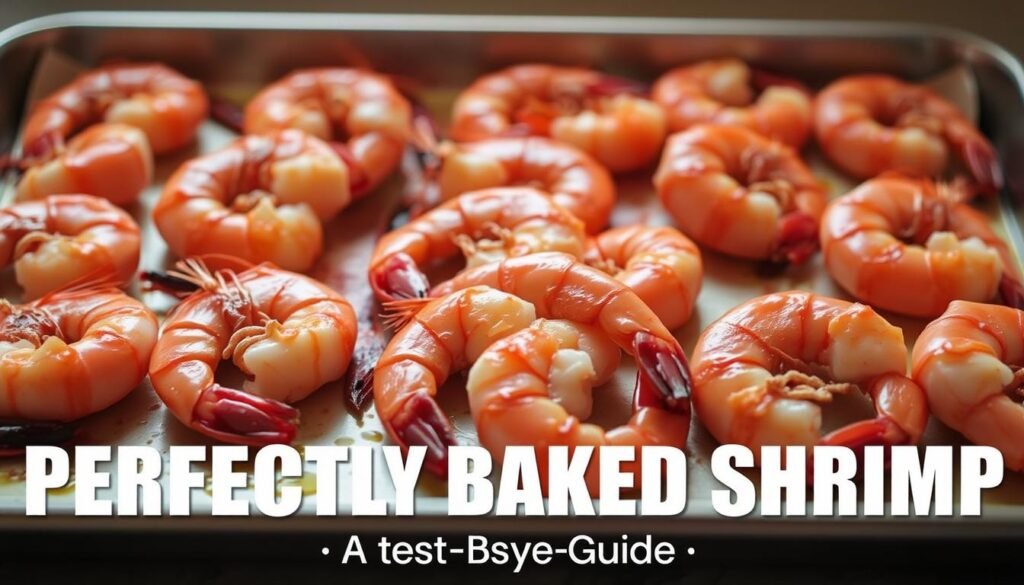
A rimmed sheet pan stops juices from dripping and keeps seasoning on the tray. I toss in a mixing bowl so every piece gets a light coat of oil, salt, and pepper before roasting.
Size, bag numbers, and quick defrost
The numbers on the bag tell how many pieces make one pound: 16/20 means 16–20 per pound; U/10 is under ten. Larger size needs a touch more time; smaller size cooks faster.
- Tools: rimmed pan, bowl, colander, paper towels, serving platter.
- Tip: run cold water over a bag in a colander, drain, then pat dry so seasoning sticks.
how to cook shrimp in the oven
A few focused steps—thaw, season, spread, and roast—are all I need for consistent results.
Prep the shrimp
I defrost frozen bags in a colander under cold running water for about 15–20 minutes, stirring so pieces separate. Then I peel and devein as needed; tails stay on for apps or off for bowls.
Season and arrange
I toss shrimp with a splash of olive oil, kosher salt, cracked pepper, and minced garlic so every piece is coated. Next I spread them in a single layer on a rimmed sheet pan; space matters—crowding traps water and slows browning.
Roast and finish
I roast at 400°F for 8–10 minutes or 450°F for 7–9 minutes. The best cues are visual: pink, opaque, and just firm to the touch.
- Tip: check early for very large pieces; pull when just done.
- Finish with a squeeze of lemon juice or a little zest and serve hot from the pan.
- For extra richness, stir in a teaspoon of butter into the hot sheet and toss lightly.
Oven Time and Temperature Guide by Shrimp Size
Temperature, count, and minutes are a trio I trust for predictable results on a sheet pan. Match temp with the piece numbers on the bag and you can plan serving by the pound without guessing.
Baking at 375°F
Large pieces: plan about 10–12 minutes. I start checking at the earlier mark so they stay juicy and never dry out.
Baking at 400°F
My go-to: roughly 8–10 minutes gives even roast and consistent doneness across the tray. This is the sweet spot for most 16/20 or 21/25 counts.
Baking at 450°F
Fast roast: expect 7–9 minutes. That time sharpens color and builds flavor, but it needs close watching so pieces don’t overcook.
Frozen vs. Thawed
If you start from frozen shrimp, I always defrost under cold water for 15–20 minutes. Baking straight from frozen risks uneven time and watered-down flavor.
Pre-cooked pieces only need a brief warm-through; remove as soon as they’re heated so they don’t turn rubbery.

“The moment the pieces are opaque and spring back, they are perfectly cooked.”
- Portion by pound using the numbers on the bag for predictable minutes.
- Watch visual cues over the clock — color and springiness matter most.
- Finish with a squeeze of lemon and any pan juice for bright flavor.
Flavor Variations, Sauces, and Serving Ideas
Bright finishes and simple sauces turn a tray of roasted seafood into a weeknight winner. Small tweaks give the same basic roast a fresh personality for any crowd.
Old Bay and citrus: I love tossing warm shrimp with Old Bay plus lemon zest for a classic, nostalgic seafood profile. A quick squeeze of lemon juice at the end makes the spices pop.
Lemon-garlic olive oil
For a bright, savory finish I whisk olive oil, minced garlic, lemon juice, and a touch of zest. Then I toss shrimp in that mix right off the sheet for a glossy, aromatic coating.
Simple sauces and pan juices
Pan juices are an effortless sauce: tilt the sheet, spoon them over rice, pasta, or greens. When I want a dip, I mix ketchup, fresh horseradish, salt, pepper, and lemon for a bold cocktail sauce that pairs well with chilled pieces.
Serving ideas
- Serve over rice or pasta with tender herbs for a quick weeknight meal.
- Toss shrimp into bowls, salads, or tacos for flexible servings.
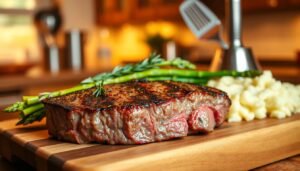
- Top a seared steak for a simple surf-and-turf that balances rich and bright notes.
“Small tweaks—smoked paprika, chili flakes, or parsley—let me tune the flavor while keeping the result reliably juicy.”
Make ahead: I often roast a pound and portion leftovers for 3–4 days; they stay tasty cold or warmed and make building bowls effortless.
Storage, Leftovers, and Meal Prep Tips
Good storage keeps flavor and texture intact. I chill roasted shrimp quickly and store portions so each serving stays bright for days.
Short fridge life, big payoff: cooked pieces hold well for 3–4 days in shallow, airtight containers. I label jars with the date and the seasonings so I know which shrimp recipe is inside.
Best containers and fridge time
I use shallow containers so food cools fast and stays safe. If any smell seems off, I toss it. Trust time and scent over chance.
Reheating without overcooking
For best texture, I warm in a low oven for a few minutes or give a quick, high-heat toss in a hot pan. The goal is just enough heat to warm—no more minutes than needed.
Make-ahead party idea
For gatherings I roast a sheet pan and keep it on low heat so guests enjoy warm shrimp cocktail right from the tray. I cover the sheet when I transport it and bring extra lemon and a quick sauce for easy serving.
- I store cooked shrimp in shallow, airtight containers so they chill quickly and stay fresh up to 3–4 days.
- Start frozen shrimp by defrosting in a colander under cold running water for 15–20 minutes; stir the bag so pieces separate, then pat dry.
- Reheat only once; repeated warming tightens texture. Portion what you need in advance in meal-prep containers with grains or greens.
- When I move a tray to a party, I cover the sheet and bring extra lemon wedges and a simple sauce for easy serving.
“Treat leftovers with quick chilling and gentle reheats for the best results.”
Conclusion
My favorite takeaway: a simple method and a hot sheet make repeatable results. Season with olive oil, lemon, garlic, kosher salt, and pepper, then roast just until pink and firm.
Laying each piece in a single layer on a rimmed sheet pan ensures even heat and juicy texture from edge to center. Visual cues—pink, opaque, and springy—beat the clock every time.
I used count numbers and pound guidance so you can match minutes to size. Finish with lemon juice and a quick sauce or keep it plain; both lead to great serving options for bowls, tacos, or pasta.
Keep this recipe handy: a few pantry staples and a reliable oven method give you baked shrimp you can trust for weeknights or a party.