

I’ve built a simple plan so you can master crispy baked wings any night of the week. I focus on quick prep, smart tools, and clear temps that keep meat juicy and skin crackling.
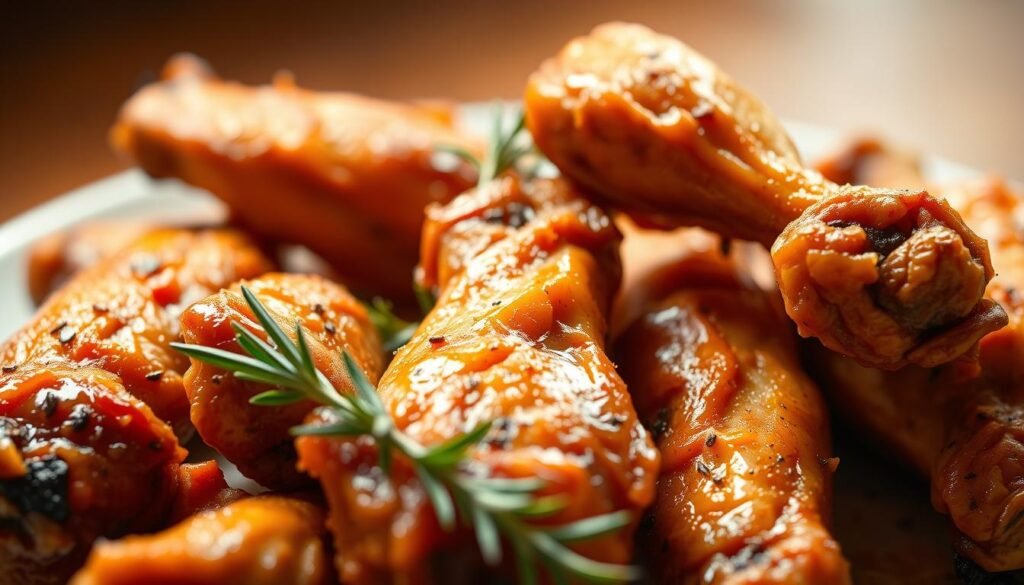
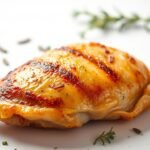
Start by patting pieces very dry, then toss them with aluminum-free baking powder and a dry rub of salt, pepper, garlic and smoked paprika. I bake at 425°F, flip once, and finish briefly at 450°F for extra crunch.
For reheating, I use a 350°F oven for 10–17 minutes or an air fryer at about 390–400°F for 7–10 minutes. Make-ahead options include marinating up to three days, rack-drying uncovered for hours, or freezing up to three months.
Tools matter: a baking sheet with a wire rack, a single layer in the air fryer, or oiled grates on the grill give reliable results. Aim for a safe internal temp of 165°F and you’ll serve great game day fare with less fuss.
Key Takeaways
- Pat pieces dry and use aluminum-free baking powder for crisp skin.
- Bake at 425°F, flip, then finish at 450°F for best crunch.
- Reheat in oven or air fryer to restore texture.
- Use a baking sheet with a rack for even airflow.
- Marinate early, rack-dry for hours, or freeze for convenience.
Why I Love Making Wings at Home
I love making chicken wings at home because they stretch a tight grocery budget and feed a crowd with very little fuss.
They cost about $1.80–$2.00 per pound, so I can scale up for game day without worry. I pick my method by season: the oven on cold nights and the grill on warm afternoons. Even if timing slips, a bright sauce and a short rest keep the meat juicy and the bite satisfying.
I use a rimmed pan and a wire rack for steady airflow, and I toss sauces in a bowl after cooking to avoid messy perforated trays. Make-ahead prep for a few days saves me time, and leftovers reheat well for quick lunches.
“Controlling ingredients and timing at home gives me cleaner flavors and better value than takeout.”
- Affordable for crowds and simple to scale.
- Versatile across seasons—oven, grill, or air fryer.
- Easy make-ahead and fuss-free reheating.
Ingredients, Tools, and Simple Swaps
My pantry staples set the stage for crisp skin and bold flavor. I keep the core mix simple: salt, black pepper, garlic powder, a touch of onion powder, and smoked paprika. I add minced rosemary when I want an herbal note.
For texture, I always use aluminum-free baking powder. It helps the skin puff and crisp without any metallic aftertaste.
I work in a large bowl so every piece gets an even rub. For airflow and even baking, I rely on a parchment-lined baking sheet and a wire rack elevated on that sheet.
Flavor boosters and smart swaps
- Swap white pepper for black pepper when you want a milder, invisible heat.
- Mix quick buttermilk with 4 tbsp milk + 1 tsp lemon juice; rest 5 minutes before using.
- For a lighter dip, make Greek yogurt ranch with yogurt, mayo, sour cream, herbs, and a splash of buttermilk.
- Keep oil minimal—just enough to grease the rack or air fryer basket to prevent sticking.
- Use a meat thermometer and pull at 165°F for safe, juicy results.
Quick tip:Prep spice blends ahead so weekday prep is fast and reliable.
How to Cook Chicken Wings in the Oven for Crispy Skin
Crisp results start long before heat. I set up my space, then preheat the oven to 425°F and line a baking sheet with parchment. Next, I ready a lightly oiled wire rack over that sheet so hot air circulates and fat drips away.
Prep and seasoning
I pat each chicken wing very dry, then toss pieces in aluminum-free baking powder and my dry rub. A quick sprinkle of pepper and garlic powder seals flavor without soggy skin.
Rack and bake
Arrange a single layer on the rack so every side browns. I bake wings about 60 minutes at 425°F, flipping every 20 minutes for even color and to prevent the rub from scorching.
Finish, rest, and serve
For extra crunch, I raise the temperature to 450°F for 3–5 minutes, flipping halfway until the crispy skin is deep golden. I aim for an internal temperature of 165°F and then rest the pieces 5 minutes.
- Alternative: 425°F for 40–50 minutes, flip once midway.
- Plate with cool ranch, celery sticks, and carrots for balance.
- If rub browns too fast, tent loosely with foil near the end.

Air Fryer Wings: Fast, Extra-Crispy Results
An air fryer gives fast, extra-crispy results with less preheat and minimal cleanup. I use a two-stage temperature plan that renders fat, then crisps the skin for a golden finish.
Timing and temperature
I set the air fryer at 380°F for 13 minutes per side. Then I raise the temperature to 400°F for about 5 minutes to finish.
As an alternative, 400°F for 10 minutes, flip, then 6–8 more minutes works well if I need a shorter total time.
Single-layer cooking and oiling
I lightly oil the basket and lay pieces in a single layer with space between them. This keeps airflow strong and the crust extra crispy.
I flip halfway through the first stage so both sides brown evenly and spices don’t scorch on one face.
“Watch minutes closely near the end—air fryers move fast and perfect turns into dry in a blink.”
- I rest the pieces 4–5 minutes so the crust firms and the meat stays juicy.
- I season before air frying and toss in sauce after to avoid smoking and soggy skin.
- I confirm 165°F at the thickest part with a thermometer for safe serving.
Grilled Wings: Charred, Juicy, and Perfect for Summer
Grilling brings loud char and smoky depth. I manage a steady medium fire so each piece gets a crisp edge without drying the meat.
I preheat the grill to about 350°F and oil the grates so the wings don’t stick. I set up two zones: a hot area for quick searing and a cooler side for gentle finishing.
Grill technique and timing
Close the lid for the first few minutes to build heat, then leave it closed for at least five minutes before the first turn. Plan roughly 20 minutes total cook time and watch hot spots closely.
I let the skin develop a light char and only flip when the piece releases easily from the grate. That tells me the sear has set and the next side will brown without tearing.
Seasoning and finishing
- I season simply with salt and pepper when I plan to toss in sauce after grilling.
- For dry-served pieces, I use a bold rub and rotate often so no patch of fat burns.
- I check a couple of pieces with a thermometer and pull them at 165°F.
“Resting off heat for a few minutes keeps the char crisp and the juices locked in.”
After a short rest I toss the wings with sauce off the grill. I serve immediately so the charred edges and crisp skin shine.
Slow Cooker Wings: Tender Meat, Optional Broil for Crunch
I turn to my slow cooker when I want juicy, fall-apart pieces with little babysitting. This method gives soft meat and deep flavor without fuss.
Timing is simple: layer chicken wings in the crock, set high for about 2 hours or low for 3–4 hours until the internal temperature hits 165°F. Don’t use frozen pieces here; thaw first for even cooking and less watery juices.
- I expect tender, pull-apart texture rather than crisp skin.
- For a little crunch, toss in sauce and broil in the oven for 3–5 minutes, watching closely because sugary sauces burn fast.
- I often return the pieces to the slow cooker on warm if I need to hold them while guests arrive.
Tip: Keep seasoning light in the pot and add a thicker sauce after slow cooking so it clings to the meat. Check a few pieces with a thermometer so you hit the safe temperature every time.
Pro Tips for Extra Crispy Baked Chicken Wings
A few simple habits turn good baked pieces into truly crisp, golden bites. Start with drying and end with precise timing; those steps matter most.
Pat-dry and fridge-dry: I pat each piece very dry, then, when I have time, fridge-dry them uncovered on a wire rack for up to 8 hours. This pulls surface moisture and helps the skin crisp instead of steam.
Pick the right powder: I always use aluminum-free baking powder — make sure it’s not baking soda. That extra lift puffs the skin without a metallic taste.
Wire rack and high heat: I bake on a rack over a sheet so hot air circulates and fat renders away from the meat. High oven temps give a crunchy exterior without a greasy finish.
Flip schedule and finish
I flip on a schedule so every side browns evenly and spices don’t scorch on one face. I pull the pieces the moment they hit 165°F and look deeply golden.
- I season with salt pepper and a touch of smoked paprika or cayenne for balanced heat.
- I avoid saucing too early; tossing after baking preserves the crust.
- Keep pans single-layered and dry—crowding or wet racks cause steaming, not crisping.
“A dry surface, an aluminum-free powder, and airflow are the three silent tricks behind perfectly crispy baked chicken wings.”
Serving Ideas, Sauces, and Make-Ahead
A good plate pairs textures and temperature. I balance hot, crisp pieces with cool dips and bright herbs so every bite feels fresh.
Homemade ranch that sings
I whisk Greek yogurt, mayo, a splash of buttermilk, dill, parsley, and a squeeze of lemon.
A pinch of garlic and onion powder rounds the flavor, and a little lemon keeps the sauce bright. This ranch works as a dip or light drizzle.
Garlic-butter toss and finishers
I melt butter with a teaspoon garlic, toss the cooked pieces in a warm pan, then finish with chopped chives.
A sprinkle of parmesan or a dusting of cheese lifts the whole dish and adds a savory note that guests love.
Game day platter and plating
I set a board with baked chicken, crisp celery, carrot sticks, and two or three dips in small warm bowls or pans.
Tossing pieces in a sauce right before serving keeps the crust intact and lets everyone build their favorite plate.
Prep ahead tips
- I season and rack-dry uncovered in the fridge for up to 8 hours so the skin starts drying early.
- I marinate up to 3 days when I want deeper flavor, then pat dry before cooking for best crisping.
- I portion sauces into small pans for easy serving and quick reheats if needed over a few days.
“A trio of sauces and a light finish of herbs or cheese makes even simple recipes feel special.”
Leftovers, Reheating, and Food Safety
I treat chilled pieces gently before reheating so texture and flavor hold up. Proper handling keeps plates tasty and safe. I store cooked items in airtight containers for up to four days, or freeze them for up to three months. Label the date so rotation is easy.
Reheat with crisp skin in mind: I preheat oven to 350°F and place pieces on a lightly oiled wire rack set over a pan. Reheat about 10–17 minutes, flipping halfway so the crust re-crisps evenly. For a faster route, I use an air fryer at about 390°F for 7–8 minutes, flipping once.
I let chilled portions sit at room temperature about 20 minutes before warming. That cut of time helps reduce drying and shortens minutes in the oven or basket.
- I check internal temperature and make sure every piece reaches 165°F.
- Avoid the microwave when you want crisp skin; it softens the crust and pushes fat unevenly.
- Finish with a quick toss in warm sauce or a dab of garlic butter for fresh flavor.
“Clean hands, clean tools, and correct temperature are the simple rules that keep leftovers both safe and delicious.”

Conclusion
Small changes in prep and heat make the biggest difference for crisp texture. I rely on aluminum-free baking powder, high oven temps, and frequent flips to get a truly crispy baked finish. strong,
I’ve shown reliable routes: oven, air fryer, grill, and slow cooker. Use a large bowl for even seasoning and a rack over a baking sheet so air flows and fat drains.
Keep seasoning simple with salt pepper and black pepper, then finish with garlic butter or serve ranch on the side. Rest pieces, check 165°F, and reheat smartly so leftovers taste like day one.
This recipe stays flexible—marinate, freeze, or bake wings in batches—and these tips help you hit extra crispy, consistent results every time.


One Response