

“Tell me and I forget. Teach me and I remember. Involve me and I learn.” — Benjamin Franklin. That line fits my view of a simple kitchen skill that rewards practice.
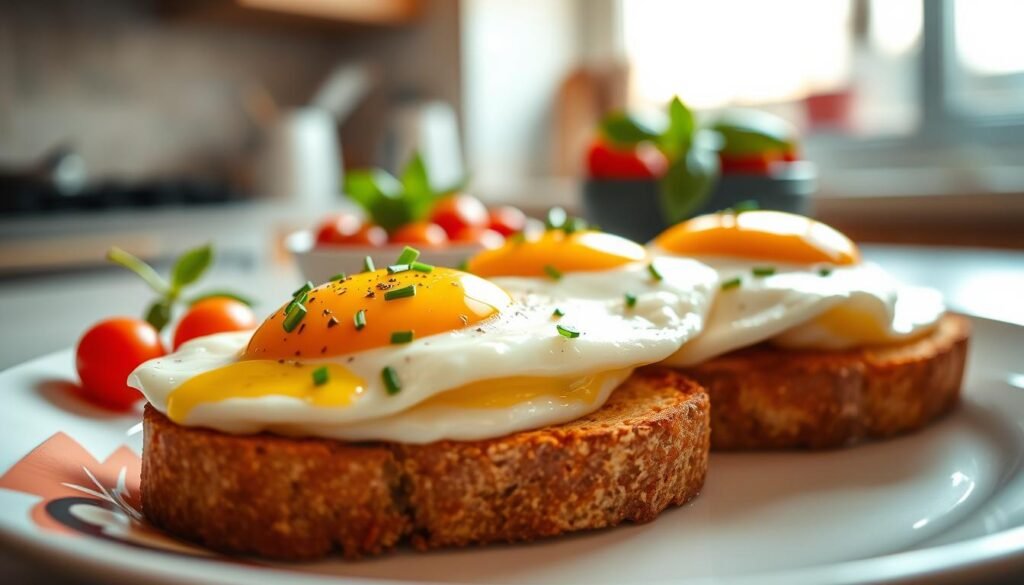
I show a clear, reliable way for over-easy eggs that gives a glossy, runny yolk and clean white. I heat the pan to medium-low, add a bit of oil or fat, and crack each egg into a small cup before sliding it in.
When whites turn opaque and edges dry, I either flip for a quick finish or add a tablespoon of water and cover to steam. The result is a luscious yolk and no sticking when the pan and fat are right.
My tips cover tool choice (stainless steel or nonstick), watch the time, and plate immediately so carryover heat doesn’t overcook. This recipe is short, practical, and perfect for a weekday breakfast.
Key Takeaways
- Preheat the pan and use a little oil or fat for release and flavor.
- Crack into a cup first, then slide the egg gently into the pan.
- Watch for opaque whites, then flip briefly or steam with a splash of water.
- Use a thin metal spatula and plate immediately to protect the runny yolk.
- Small changes in heat and tool choice make this an easy eggs win every time.
Why I love over-easy eggs for a quick breakfast right now
I reach for a runny-centered egg when I want a simple, satisfying start to the day. In about three minutes on low to medium-low heat, I get tender whites and glossy yolks that make toast or a warm bowl feel special.
Protein-packed and fast: a single egg gives a solid protein boost and doubles as a built-in sauce. I slide one onto avocado toast or a leftover grain bowl and the plate transforms without extra prep.
I keep the heat low, flip only when the edges are dry and the whites are set, and practice one egg at a time until I can read the cues. These little habits cut down on mistakes and save time on busy mornings.how-to-cook-scallops-in-the-oven
- I use easy eggs as a top-it-all finisher for hash, bowls, or simple sides.
- I plate immediately so the yolks stay glossy and not overcooked.
- They scale to two or three eggs if my pan has room, but one egg at a time helps me learn timing.
| Pairing | Cook time | Why it works |
|---|---|---|
| Avocado toast | ~3 minutes | Runny yolk acts as a creamy spread |
| Rice or grain bowl | ~3 minutes | Adds protein and glossy sauce-like texture |
| Breakfast hash | ~3 minutes | Bright yolks lift savory vegetables |
Tools, pans, and fats I use for perfect over-easy eggs

I tune heat, fat, and the pan before I even crack an egg; that setup does most of the work.
Stainless steel, nonstick, ceramic, and cast iron
Stainless steel is my most consistent choice. I preheat an All-Clad D5-style pan on medium-high for 30–60 seconds, lower the heat, then add fat. When the fat moves quickly the surface is ready and release improves.how-to-cook-rice-in-a-rice-cooker
Nonstick makes flipping effortless, but I keep temps low and watch the coating so it doesn’t wear. Ceramic needs a gentler touch: add olive oil to a cold pan and bring heat up slowly to protect the finish.
Cast iron holds heat like a champ but can cling to whites and over-brown. I save it for browned-edge goals or when it’s impeccably seasoned.
Butter, ghee, and olive oil choices
I rotate butter for flavor, ghee for higher-heat tolerance, and olive oil when I want a lighter profile. Any fat should be hot but not smoking before the egg goes in.
The best spatula and a lid
A thin, sharp metal spatula slides under eggs best in stainless steel. In nonstick I use a wide, non-scratching spatula for full support under the yolk. A lid is non-negotiable when I steam: I add 1 tablespoon water per egg, cover for about a minute, and the top sets without flipping.
| Pan type | Preheat | Best fat |
|---|---|---|
| Stainless steel | High short, then medium | Butter or oil |
| Nonstick | Low | Butter or ghee |
| Ceramic | Cold oil, low heat | Olive oil |
| Cast iron | Even heat, careful | Ghee or butter |
My tip: learn each pan’s preheat rhythm and use a smaller pan for one or two eggs for better control. For a neat sandwich egg, oil a silicone ring or mason jar ring, pour the egg, and remove the ring with tongs when done.
For a full step-by-step recipe guide, try my linked walkthrough for timing and plating notes.
How to cook over easy eggs: my step-by-step method

My step-by-step routine focuses on timing and gentle heat so the yolk stays runny and the white sets cleanly.
Preheat and add fat: Heat a dry stainless pan for 30–60 seconds, then add a teaspoon of butter, ghee, or oil. Wait until the fat moves quickly or a few drops of water sizzle. The pan should be hot but not smoking.how-to-cook-chorizo
Crack and set: Crack each egg into a small bowl, check for shell, then slide it into the hot pan. Let the egg cook uncovered until the whites turn opaque and the edges look dry. This usually takes a couple of minutes on low to medium-low heat.
Flip or steam the second side: For a no-flip steam, splash 1 tablespoon water per egg, cover, and steam about 1 minute. For a flip, slide a thin spatula under the egg, flip confidently, and cook 30 seconds to 1 minute for a runny yolk.
Plate immediately: Remove the egg to a warm plate right away. Even a hot pan off the burner can finish the yolk in under a minute. These precise instructions and minimal ingredients make the result repeatable every time.
Doneness and methods: flip, steam, and sunny-side variations

I focus on simple timing cues that let me choose a flip, a quick steam, or a sunny-side finish with confidence. The approach is about seconds and small heat adjustments in the pan so the whites set while the center stays glossy.how-to-cook-carne-asada
Classic flipped: timing by the seconds
Flip once the edges are dry and the whites look opaque. For the loosest center, cook the second side about 30 seconds. For a slightly firmer yolk, push that toward 45–60 seconds. Watch the clock—those few important seconds make the difference.
Steam set: quick cover with a splash
The no-flip route uses 1 tablespoon water per egg. Cover the pan and steam for roughly 1 minute, then uncover immediately. This creates a thin veil over the yolks while the whites finish without browning.
Sunny-side with a runny yolk: a simple yolk placement trick
I set the whites for 30–60 seconds first, then nudge the yolk into the center if it’s off. Cover for about 30 seconds of steam, then finish uncovered up to a minute if needed. This preserves a shiny yolk and clean whites.
“Small timing adjustments are what help me dial in the exact texture I like every single time.”
- Keep the pan at low to medium-low so whites cook through without browning.
- Leave space between two eggs so steam circulates or each egg flips cleanly.
- Use visual cues—no translucent whites, shiny yolks—over strict minutes when possible.
Timing, temperatures, and cues I watch for

I rely on simple visual cues and modest heat to hit the texture I want every time.
Low, steady heat is my baseline. I set the burner to low or medium-low. If the white turns golden within two minutes, the heat is too high and I lower it immediately.
I watch the edges for dryness and the whites for a shift from translucent to opaque. Those are my signals to flip or add a splash of water and cover.how-to-cook-new-york-strip-steak
Practical cues and small rules
- I center the yolk before a flip by nudging the pan gently so the spatula can support it fully.
- When I steam, I set a timer for 1 minute—45 versus 75 minutes makes a surprising difference in texture.
- I practice one egg at a time so my pan’s preheat and my timing stay consistent.
“When in doubt, pull the egg a little early — it’s easier to add seconds than to undo overcooking.”
For a short guide that pairs with my notes, see my linked recipe walkthrough for timing and plating cues.
Troubleshooting and pro tips for easy eggs

Sticky whites, torn edges, or a broken yolk are normal — and easily recoverable with a few simple moves. I keep a calm rhythm at the pan and focus on small fixes that work fast.
If an egg sticks: splash a little water around the edges to create instant steam, then slide a thin, firm metal spatula under the white and ease the egg free. This trick rescues stainless pans most reliably.
Broken yolks and ragged whites: I crack into a small dish first and pour gently into the pan. If a yolk breaks, I season and serve — then practice cracking lower next time. Ragged whites usually mean the pan was too hot or I moved it too much; lower the heat and steady your hand.
- I center a wide, flat spatula under the yolk before a flip and move in one confident motion.
- Keep lid timing tight — over-steaming will dull the yolk and ruin texture.
- Cast iron can grab whites unless it’s super seasoned; while learning I stick with stainless or nonstick pans.
Avoid overcooking: don’t walk away and don’t leave an egg sitting in a hot pan after it’s off the burner. Carryover heat finishes the job fast, often within seconds.
“When you practice one egg at a time, your timing and confidence grow far quicker than trying multiple at once.”
Serving ideas, seasoning, and quick add-ons

Bright toppings and a warm slice of toast make a single yolk feel like a full meal. I serve my eggs immediately so the runny yolk stays glossy and saucy on the plate.how-to-cook-mahi-mahi
I love sliding one onto avocado toast and letting that yolk mingle with flaky salt, fresh pepper, and a drizzle of olive oil. For bowls, I pile greens or leftover grains, spoon on chili crisp for crunch, then top with the egg so the heat tames the sauce.
Avocado toast, breakfast bowls, and “fun” sandwiches
Grilled cheese with an egg in the middle is a weekday favorite; the first bite gives a gooey surprise. Bowls get tomatoes, herbs, and a squeeze of lemon that plays well with richness. If I plate multiple, I keep warm toast nearby and serve right away—seconds matter.
Seasonings I love
- Flaky salt and cracked pepper — my go-to.
- Chili crisp, hot sauce, or a pinch of paprika for lift.
- A light drizzle of olive oil after cooking for shine and flavor.
Leftovers and reheating
Cool leftovers to room temperature, refrigerate up to two days, and reheat gently in a nonstick pan over low heat or microwave for a few seconds. I prefer under-warming and adding a few more seconds than overshooting and losing that soft center.
| Serve | Quick add | Timing |
|---|---|---|
| Avocado toast | Flaky salt, pepper, olive oil | Serve immediately |
| Breakfast bowl | Chili crisp or salsa, lemon | Top just before plating |
| Sandwich | Grilled cheese or greens | Assemble and eat hot |
For a short guided walkthrough that pairs with these serving notes, check this quick recipe guide.
Conclusion
A steady low flame and small adjustments are what turn a simple pan into reliable results.
Keep heat low, flip when the edges are dry, or steam with 1 tablespoon water per egg for about 1 minute as an alternative.
I practice one egg at a time, use a thin spatula in stainless pans, and plate immediately so carryover heat doesn’t firm the yolk. If I need leftovers, I reheat briefly on low heat.
With these simple instructions and a short recipe mindset, you can make perfect over-easy eggs in minutes. Use the basics across other recipes and enjoy the protein payoff every time.how-to-cook-a-pre-cooked-ham