
Surprising fact: nearly 40% of home roasts dry out from overcooking—so small technique changes make a huge difference.
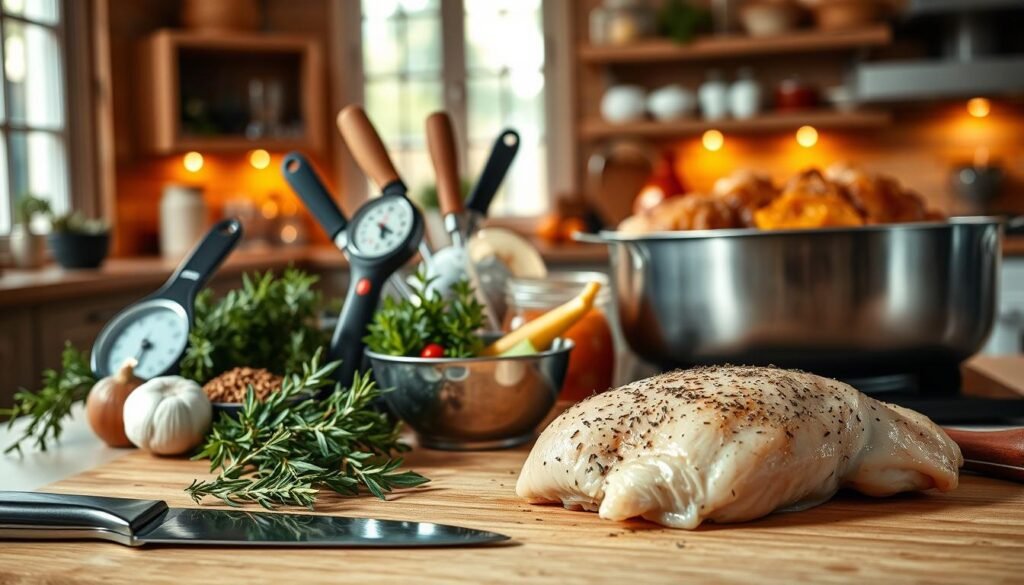
I’ll walk you through a simple oven, Dutch oven, and air fryer plan that keeps skin crisp and meat juicy. I use a thermometer and exact minutes and temperatures at 350°F so you never guess internal doneness.
My go-to is a 4–5 lb boneless turkey with skin for best results. I thaw fully, bring it to room temp, pat it dry, and slip seasoned butter under the skin for flavor and protection.
Along the way I explain basting, resting under foil, and when to rotate the pan. These small moves lock in the juices and give you even browning for Thanksgiving or an easy weeknight meal.
Key Takeaways
- Use a thermometer and roast at 350°F for consistent results.
- Choose a skin-on boneless turkey for crisp skin and juicy meat.
- Rub softened butter under the skin and season well for flavor and moisture.
- Baste, rotate, and rest under foil to keep slices tender and juicy.
- I share oven, Dutch oven, and air fryer steps with exact time ranges.
Why My Method Keeps Boneless Turkey Breast Juicy Every Time
Simple moves—netting for shape, butter under the skin, and regular basting—make the difference.
I start by letting the roast sit at room temp for 30–40 minutes so internal heat evens out. This small step cuts uneven cooking and helps the center finish without dry edges.
I lift the skin and rub softened butter mixed with chopped herbs both under and over. That layer shields the meat and adds flavor while the exterior crisps.
During roasting at 350°F I baste 4–5 times with pan juices. I also rotate the pan for even browning and monitor internal temperature with a probe so I pull at the right moment.
After the oven I tent the roast and let it rest 10–20 minutes under foil. This gives juices time to redistribute, yielding moist slices from edge to center.
| Step | Why it matters | Quick tip |
|---|---|---|
| Room tempering | Promotes even doneness | 30–40 minutes |
| Butter + herbs under skin | Protects surface and flavors meat | Use softened butter |
| Baste & rotate | Maintains moisture and browning | 4–5 baste passes |
| Rest | Redistributes juices for juicy slices | 10–20 minutes tented |
Choosing the Right Boneless Turkey Breast (skin-on vs. skinless, netting, and size)

Selecting the proper roast sets you up for even cooking and juicy slices every time. I focus on pieces that give me control: consistent thickness, intact skin, and a sensible weight.how-to-cook-garbanzo-beans
Skin-on vs. skinless: moisture, flavor, and crispy skin
I prefer a skin-on roast because the skin shields the meat and renders fat that bastes the surface. That fat helps keep the center tender while creating a craveable crispy top.
If you pick a skinless option, make sure you add extra fat in your ingredients list or plan a snug foil tent. Without that protection, the roast dries faster.how-to-cook-shrimp-in-the-oven
Netting stays on: better shape and even cooking
I leave the netting on most packaged roasts. The net keeps shape uniform so the center cooks at the same rate as the edges and I avoid dry spots.
- I aim for a 4–5 lb piece for oven roasting at 350°F; that usually needs about 90–100 minutes.
- If a roast is pre-seasoned or injected, check sodium levels so you can adjust your salt and pepper accordingly.
- For Dutch oven work, netting helps maintain consistent thickness across the roast.
| Feature | Why it matters | Quick tip |
|---|---|---|
| Skin-on | Protects and renders fat for moisture | Tuck butter-herb rub under the skin |
| Netting | Keeps uniform shape, even cooking | Leave it on for roasting; remove before serving |
| Size (4–5 lb) | Balanced cook time and servings | Roast ~90–100 minutes at 350°F |
“Choose a roast with smooth, intact skin and a good fat layer under it — that simple choice makes slicing far easier and results juicier.”
Prep and Seasoning Essentials for Tender, Moist Meat

A calm, methodical prep sets the stage for juicy results and a golden surface. I always thaw the roast completely in the fridge, then remove it 30–40 minutes before it hits the oven. That short pause evens internal temps so the meat cooks without dry edges.how-to-cook-sweet-potatoes-in-the-oven
I pat turkey breast dry with dry paper towels so the skin can crisp and the rub stays put. Then I salt evenly and let the surface rest for a few minutes so the seasoning begins to penetrate.
My butter-based rub mixes softened unsalted butter with oregano, thyme, garlic powder, and onion powder. I spread most of it over the skin and gently lift the skin to work some underneath. That inner layer bastes the breast from within while roasting.
If I want lighter fats, I swap in olive oil but keep the same herbs and garlic notes. I finish by checking seasoning, smoothing the skin, and arranging the roast so the oven can give even browning.
Oven-Roasted Boneless Turkey Breast at 350°F

An even 350°F roast rewards patience: careful prep and timed baste passes make juicy slices every time. I preheat the oven and have the pan ready so the roast goes into steady heat without delay.
Lift the skin and rub butter and herbs under and over
I pat the surface dry with dry paper towels, salt evenly, then lift the skin. I spread half the butter-herb mix under the skin and the rest over the top and sides. I use garlic powder and thyme for depth.how-to-cook-farro
Place the roast skin side up and baste with pan juices
I place turkey breast skin side up in a baking pan and roast uncovered. I baste with hot juices 4–5 times so the surface stays glossy and moist.
Use a thermometer and rotate for even cooking
I track progress with a thermometer and rotate the pan midway. For a 4–5 lb piece I expect about 90–100 minutes, aiming for an internal temperature of 165°F in the thickest part.
Cover with foil and let rest
When the roast hits temp I remove it, cover with foil, and let rest 10–20 minutes. This step lets juices redistribute so slices stay tender. I use pan juices as an easy au jus or base for gravy.
“A steady oven and careful basting are the simplest ways I keep meat juicy every time.”
For a full, printable method see my oven-roasted turkey breast recipe for exact timings and tips.
Dutch Oven Boneless Turkey Breast with Citrus-Herb Rub

When I want fragrant, evenly browned slices, the Dutch oven is my go-to vessel. It lifts the roast off the pan and lets aromatics protect the underside while the top browns.how-long-to-cook-chicken-thighs-in-air-fryer
Prep: I pat turkey breast dry, leave the netting on for shape, and rub a bright mix of orange zest, minced rosemary, parsley, thyme, sage, garlic, salt, and pepper bound with olive oil.
Build a bed of orange and onion slices
I arrange alternating orange and onion slices in the Dutch oven so the roast sits on a soft, fragrant bed. This layer cushions heat and adds moisture while roasting.
Roast uncovered, finish with oil, and rest before carving
I roast at 350°F for about 90 minutes, drizzling remaining olive oil at 60–75 minutes to help color and keep surface fat glossy.
I monitor with a thermometer and pull when the innermost temperature reaches 160–165°F. Then I tent with foil and let it rest 10–15 minutes before snipping off the netting and carving.
- Leftovers go in the fridge up to 3 days.
- Reheat gently at 300°F with broth covered for 20–30 minutes or use a microwave at 50% under a damp towel.
“The citrus-herb bed protects the meat while the top develops delicate browning—great with classic sides or sliced for sandwiches.”how-to-cook-salmon-in-a-pan
Air Fryer Boneless Turkey Breast for Speed and Crisp
For quick weeknight dinners, the air fryer gives a crisp top and a tender interior in under an hour. I use a 3 lb Butterball boneless turkey breast and keep the netting on, loosening it slightly so the skin can be pulled down to cover the meat for protection.
Season, place skin side down, then flip
I rub the roast with avocado oil, then press a mix of granulated garlic, dried parsley, kosher salt, black pepper, and paprika into the surface. That seasoning forms a savory crust while using less fat.
I place the turkey breast skin side down in the air fryer basket for the first stint. This avoids scorching and helps the underside brown more gently. After 20–25 minutes at 350°F, I flip and continue cooking about 35 more minutes.
Check temperature and tent with foil
I monitor the thickest section with a thermometer and aim for 170°F before resting. When it reaches temp, I tent the roast with foil and let it rest 10–15 minutes. That pause lets juices settle so slices stay moist.
- I remove the netting after resting and slice across the grain.
- Leftovers keep up to 4 days refrigerated and reheat gently under foil.
- This method delivers crisp skin, minimal added fat, and juicy meat in under an hour of active minutes.
| Item | Details | Quick tip |
|---|---|---|
| Roast | 3 lb Butterball boneless turkey breast, netting loosened | Keep skin pulled down over meat |
| Seasoning | Granulated garlic, parsley, kosher salt, black pepper, paprika, avocado oil | Pat oil on first so rub sticks |
| Air fryer schedule | 350°F — 20–25 minutes skin side down, flip, ~35 minutes more | Check with a thermometer |
| Finish | Remove at 170°F, tent with foil, rest 10–15 minutes | Slice after resting for moist pieces |
“The air fryer gives fast crisping with less added fat, making it ideal for small gatherings and easy weekly recipes.”
For another reliable approach, see this practical air fryer method that pairs well with the seasonings I use.
how to cook a boneless turkey breast: temperature, time, and doneness

Timing and thermometer work together: nail the right internal number and the rest falls into place.
Target internal temperature:
Target internal temperature: 165°F in the thickest part (carryover counts)
I go by internal temperature, not just minutes on the clock. For oven roasts I pull at 165°F in the thickest part and allow carryover while the meat rests.how-to-cook-pinto-beans-in-a-pressure-cooker
Typical timing at 350°F and why weight and starting temp matter
At 350°F a 4–5 lb skin-on piece usually needs about 90–100 minutes. That is a good baseline, not a rule.
Oven accuracy, roast weight, and how cold the roast is when it goes in change total time. I begin checking near the 75-minute mark so I can finish the last few minutes without overshooting.
Let rest 10-20 minutes: seal in juices before slicing
I always insert a thermometer into the center of the meat, avoiding contact with the pan. For Dutch oven roasts I may remove at 160–165°F because the heavy pot adds residual heat.
After pulling the roast, I tent it with foil and let rest 10–20 minutes. This step lets juices redistribute and the carryover completes the final few degrees.
- I use a probe thermometer for reliable reads, not guesswork.
- If the roast started very cold, plan extra minutes; if it tempered, it may need less time.
- Air fryer and basket ovens vary—always verify with your thermometer.
“By balancing time and temperature, I get predictable doneness and consistently juicy slices.”
Simple Flavor Variations and Pantry Swaps

Small flavor changes give big impact—no extra work, just different mixes.
Classic butter-herb rub: I mash softened butter with oregano, thyme, garlic powder, and onion powder. I spread most under the skin and the rest on top. This blend browns nicely and adds rich flavor without fuss.
Citrus-herb bright option: I grate orange zest and mix it with fresh rosemary, sage, parsley, thyme, minced garlic, and olive oil. It lifts the roast and pairs well with fall and spring sides.
Oil swaps and pantry-only mixes: When I skip butter, I use olive oil or avocado oil. For quick pantry recipes I use garlic powder, dried herbs, salt, and pepper—easy, reliable, and scalable for any turkey breast or whole bird.how-to-cook-bacon-in-the-oven-with-aluminum-foil
- I massage seasoning under and over the skin for full coverage.
- These mixes scale for larger roasts or double batches for a crowd.
- For a bolder finish, I add paprika or cayenne to the butter base.
| Rub | Key ingredients | Best use |
|---|---|---|
| Classic butter-herb | Butter, oregano, thyme, garlic powder, onion powder | Golden top and rich flavor for oven roasts |
| Citrus-herb | Orange zest, rosemary, sage, parsley, garlic, olive oil | Bright, fresh profile for sandwiches or holiday plates |
| Pantry quick mix | Garlic powder, dried herbs, salt, pepper, avocado oil | Fast weeknight recipes and minimal prep |
“A small swap of fat or an extra pinch of zest can transform the whole meal.”
Serving, Sides, Storage, and Reheating Without Drying Out

When it’s time to plate, simple pairing and gentle reheating keep each slice juicy and bright.
Thanksgiving-ready sides that pair perfectly:
- I serve slices with mashed potatoes, roasted vegetables, and cranberry sauce for an easy, balanced plate.
- I favor low sugar sides and something acidic or citrusy for contrast — it lifts the savory notes.
Fridge, freezer, and gentle reheating with broth and foil:
Cool leftovers quickly and store in airtight containers in the fridge. Use within 3–4 days, or freeze up to 3 months.
To reheat, I place turkey in a small baking dish, add a splash of broth, cover with foil, and warm in the oven at 300°F for 20–30 minutes until heated through.
If I’m short on time, I microwave at 50% power in short bursts, covering the meat with a damp paper towel so the surface does not dry.how-to-cook-quinoa-in-a-rice-cooker
- I slice before reheating so the center warms faster and the juices return to the pan.
- I watch sodium when using store broths or injected roasts and adjust seasoning at the table.
- For planning, I set serving time backward so the roast can rest and sides stay hot for the table.
“Slice first, warm gently, and add a splash of broth — small steps that keep every bite tender.”
For make-ahead guidance that fits holiday rhythms, see my quick make-ahead tips and other reliable recipes.
Conclusion
This final note ties the methods together so you can pick the right tool and get juicy results every time. For a 4–5 lb boneless turkey breast, plan about 90–100 minutes at 350°F in the oven; a Dutch oven on an orange–onion bed also roasts around 90 minutes. A 3 lb roast in the air fryer finishes near 55–60 minutes at 350°F.
Pull at 165°F (160–165°F is fine for the Dutch oven), baste and rotate for even color, keep the netting for shape, then tent with foil and rest 10–20 minutes before slicing.
Reheat gently with broth at 300°F or use a microwave at 50% under a damp towel. For a printable map of this turkey breast recipe, see my guide on moist and tender turkey breast.